Vue.js
概述
- Vue是一个专注于构建web用户界面的 JavaScript 库
- 作者:尤雨溪,中国人,早前就职于 Google
- 思想:MVVM(Model-View-ViewModel)
- 一个渐进式的框架
使用
1.基础案例
<!DOCTYPE html>
<html>
    <head>
        <meta charset="utf-8" />
        <title></title>
        <script src="js/vue.js" type="text/javascript" charset="utf-8"></script>
    </head>
    <body>
        <div id="app">
            {msg}
        </div>

        <script>
            var app = new Vue({
                el: "#app",
                data:{
                    msg:'hello'
                }
            });
        </script>
    </body>
</html>
el:是一个必不可少的属性,用来指定一个页面中已存在的Dom元素来挂载vue实例,其值可以是一个dom元素,也可以是css选择器
data:存放数据的对象
{}*2:文本插值,类似于:innerText,会把数据原封不动的显示出来,其中的值可以是JavaScript的表达式
Vue3
<!DOCTYPE html>
<html lang="en">
<head>
    <meta charset="UTF-8">
    <title>VueDemo</title>
    <script src="js/vue.js"></script>
</head>
<body>
    <div id="app">
        {msg}
    </div>

    <script>
        const config = {
            data(){
                return {
                    msg:"hello"
                }
            }
        }

        //Vue.createApp(config):基于config配置对象,创建一个Vue应用实例
        //mount("#app"):把Vue实例挂载到id为app的div上
        const root = Vue.createApp(config).mount("#app");
    </script>
</body>
</html>
2.v-html
v-html:会对数据中的html内容进行解析,显示解析后的结果,类似于Dom的 innerHTML
v-text: 不会对数据中的html内容进行解析,类似于dom中的 innerText
        <div id="app">
            {msg}<br>
            <p v-text="msg"></p>
            <p v-html="msg"></p>
        </div>

        <script>
            var app = new Vue({
                el: "#app",
                data:{
                    msg:'<span style="color:red;">hello</span>'
                }
            });
        </script>
3.v-bind
动态绑定一个或多个属性(简写形式: 冒号)
        <div id="app">
            <p :align="align" v-html="msg"></p>
        </div>

        <script>
            var app = new Vue({
                el: "#app",
                data:{
                    msg:'<span style="color:red;">hello</span>',
                    align:'right'
                }
            });
        </script>
4.v-model
绑定表单数据,双向绑定
        <div id="app">
            <input type="text" v-model="msg">
        </div>

        <script>
            var app = new Vue({
                el: "#app",
                data:{
                    msg:'<span style="color:red;">hello</span>',
                }
            });
        </script>
5.v-on
绑定事件处理程序(简写:@)
        <div id="app">

            <input type="text" :value="msg">
            <input type="button" value="按钮" @click="del">
        </div>

        <script>
            var app = new Vue({
                el: "#app",
                data:{
                    msg:'<span style="color:red;">hello</span>',
                },
                methods:{
                    del(){
                        console.log(100);
                    }
                }
            });
        </script>
6.v-show
是否显示元素
当 v-show的值为:0、空字符串、undefined、null、false、NaN时候隐藏,其他显示
<p v-show="isShow">可能隐藏的内容</p>

data:{
    isShow:null
}
7.v-if、v-else-if、v-else
<p v-if="isShow">可能隐藏的内容</p>
<p v-else-if="elseIf">else if 部分</p>
<p v-else>else 部分</p>

data:{
    isShow:0,
    elseIf:0
}
v-if和v-show区别
v-if:如果为false,删除dom元素,为true:创建dom元素
v-show:用来显示和隐藏元素
8.v-for
循环指令
<p v-for="(name,index) in arr" >{index}-{name}</p>

data:{
  arr:["tom","marry","scott"]
}
html模板
<!DOCTYPE html>
<html>
    <head>
        <meta charset="utf-8">
        <title></title>
        <script src="js/vue.js" type="text/javascript" charset="utf-8"></script>

    </head>
    <body>
        <div id="app">

        </div>
        <script type="text/javascript">
            var app = new Vue({
                el:"#app",
                data:{

                }
            });
        </script>
    </body>
</html>
省市级联案例

<!DOCTYPE html>
<html>
    <head>
        <meta charset="utf-8">
        <title></title>
        <script src="js/vue.js" type="text/javascript" charset="utf-8"></script>

    </head>
    <body>
        <div id="app">
            省份:
            <select @change="getCity" v-model="province">
                <option>请选择</option>
                <option v-for="(item,index) in map.keys()">{item}</option>
            </select>
            城市:
            <select>
                <option>请选择</option>
                <option v-for="(item,index) in cities">{item}</option>
            </select>
        </div>
        <script type="text/javascript">
            var app = new Vue({
                el:"#app",
                data:{
                    map: new Map([
                        ["辽宁",["沈阳","大连"]],
                        ["吉林",["长春","四平"]],
                        ["黑龙江",["哈尔滨","齐齐哈尔"]]
                    ]),
                    province:'请选择',
                    cities:[]
                },
                methods:{
                    getCity(){
                        this.cities = this.map.get(this.province);
                    }
                }
            });
        </script>
    </body>
</html>
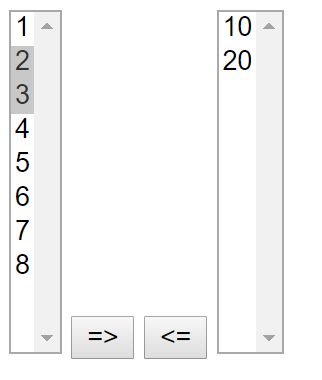
移动列表选中项案例
<!DOCTYPE html>
<html>
    <head>
        <meta charset="utf-8">
        <title></title>
        <script src="js/vue.js" type="text/javascript" charset="utf-8"></script>
    </head>
    <body>
        <div id="app">
            <select size="10" multiple="multiple" v-model="leftSelected">
                <option v-for="n in leftList" >{n}</option>
            </select>
            <input type="button" value="=>" @click="toRight">
            <input type="button" value="<=" @click="toLeft">
            <select size="10" multiple="multiple">
                <option v-for="n in rightList" :value="n">{n}</option>
            </select>
        </div>

        <script>
            var app = new Vue({
                el:"#app",
                data:{
                    leftList:[1,2,3,4,5,6,7,8],
                    rightList:[10,20],
                    leftSelected:[2,3]

                },
                methods:{
                    toRight(){
                        for(n of this.leftSelected){
                            this.rightList.push(n);
                        }
                        var temp = this.leftList.filter(n=>!this.leftSelected.includes(n));
                        this.leftList = temp;
                    },
                    toLeft(){

                    }
                }
            });
        </script>
    </body>
</html>
vue3实现
<!DOCTYPE html>
<html lang="en">
<head>
    <meta charset="UTF-8">
    <title>vuedemo</title>
    <script src="js/vue.js"></script>
    <style>
        select{
            width:40px;
            height: 200px;
        }
    </style>
</head>
<body>
    <div id="app">
        <select multiple size="15" v-model="leftSel">
            <option v-for="n in left">{n}</option>
        </select>
        <input type="button" value="=>" @click="toRight">
        <input type="button" value="<=" @click="toLeft">
        <select multiple size="15" v-model="rightSel">
            <option v-for="n in right">{n}</option>
        </select>
    </div>
    <script>

    //vue的配置对象
    let config = {
        data(){
            return {
                left:['1','2','3','4','5','6','7','8','9'],
                right:[],
                leftSel:[],
                rightSel:[]
            }
        },
        methods:{
            toRight(){
                for(let i = 0;i < this.leftSel.length;i++){
                    this.right.push(this.leftSel[i])

                    let index = this.left.indexOf(this.leftSel[i]);
                    this.left.splice(index,1)
                }
                this.leftSel.length = 0

            },
            toLeft(){
                for(let i = 0;i < this.rightSel.length;i++){
                    this.left.push(this.rightSel[i])

                    let index = this.right.indexOf(this.rightSel[i]);
                    this.right.splice(index,1)
                }
                this.rightSel.length = 0
            }
        }
    }
    //createApp方法返回一个应用程序对象
    const app = Vue.createApp(config);
    const p = app.mount("#app")
    </script>
</body>
</html>
<script>

</script>
vue绑定复选框
<input type="checkbox" v-model="all" value="1">

如果all为数组,选中复选框,value值在数组中,没有选中,value值不在数组中
data:{
    all:[]
}

如果all不是数组,选中复选框,all的值为true,不选中,为false
data:{
    all:true
}
vue绑定下拉列表框
<select v-model="s" multiple>
    <option>1</option>
    <option>2</option>
    <option>3</option>
</select>

如果有multiple属性,需要绑定一个数组,数组中的元素被选中
data:{
    s:[]
}

如果没有multiple属性,需要绑定单个值,value等于该值的被选中,没有value属性的,value属性等于innerText
data:{
    s:'2'
}
vue绑定单选按钮
<input type="radio" value="1" v-model="r">
<input type="radio" value="2" v-model="r">

单选按钮需要绑定到单个值,不能绑定到数组,当v-model的值与value值相等的时候,单选按钮被选中
data:{
    r:'1'
}
Vue动态添加属性
默认情况下,vue不跟踪动态添加的属性
        <div id="app">
            {stu.name}
            <input type="button" value="动态添加属性" @click="addAttr">
        </div>
        <script type="text/javascript">
            var app = new Vue({
                el:"#app",
                data:{
                    stu:{}
                },
                methods:{
                    addAttr(){
                        // this.stu.name ="tom";//不行
                        // this.$set(this.stu,"name","tom")//可以
                        Vue.set(this.stu,"name","tom");
                    }
                }
            });
        </script>
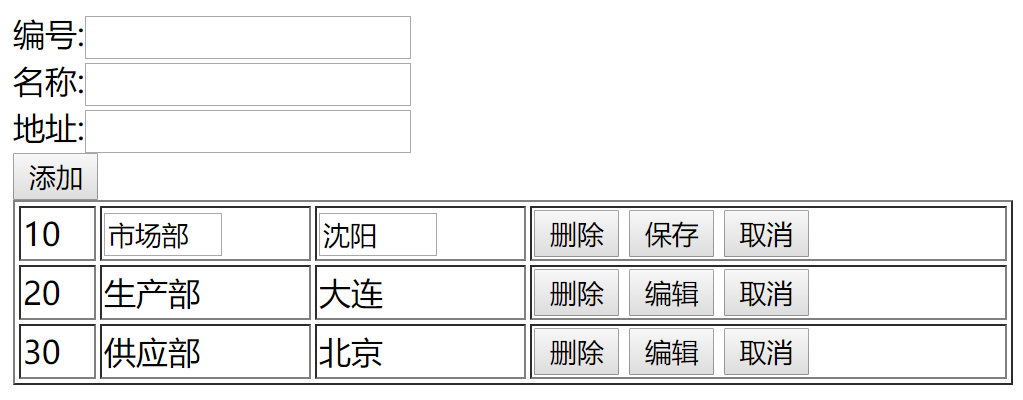
综合案例:员工管理
<!DOCTYPE html>
<html>
    <head>
        <meta charset="utf-8">
        <title></title>
        <script src="js/vue.js" type="text/javascript" charset="utf-8"></script>

    </head>
    <body>
        <div id="app">
            编号:<input type="text" v-model="dept.deptno"><br>
            名称:<input type="text" v-model="dept.dname"><br>
            地址:<input type="text" v-model="dept.loc"><br>
            <input type="button" value="添加" @click="add"><br>
            <table border="1" width="500">
                <tbody >
                    <tr v-for="dept,index in depts">
                        <td>{dept.deptno}</td>

                        <td v-if="dept.edit">
                            <input type="text"  v-model="tempDept.dname" size="4">
                        </td>
                        <td v-else>{dept.dname}</td>

                        <td v-if="dept.edit">
                            <input type="text"  v-model="tempDept.loc" size="4">
                        </td>
                        <td v-else>{dept.loc}</td>
                        <td>
                            <input type="button" value="删除" @click="del(index)">
                            <input type="button" :value="dept.editBtnValue" @click="handleClick(dept,index)">
                            <input type="button" value="取消" @click="cancel(dept,index)">
                        </td>
                    </tr>
                </tbody>
            </table>
        </div>
        <script type="text/javascript">
            var app = new Vue({
                el:"#app",
                data:{
                    depts:[],
                    dept:{},
                    tempDept:{},
                    editBtnValue:"编辑"
                },
                created(){
                    //模仿ajax操作,得到部门集合
                    this.depts = [
                        {"deptno":10,"dname":"市场部","loc":"沈阳","editBtnValue":"编辑"},
                        {"deptno":20,"dname":"生产部","loc":"大连","editBtnValue":"编辑"},
                        {"deptno":30,"dname":"供应部","loc":"北京","editBtnValue":"编辑"}
                    ]

                },
                methods:{
                    del(index){
                        if(confirm("是否删除?")){
                            this.depts.splice(index,1);
                        }
                    },
                    add(){
                        this.depts.push(this.dept);
                        this.dept = {};
                    },
                    handleClick(dept,index){
                        if(dept.editBtnValue == "编辑"){
                            this.$set(dept,"edit",true)
                            dept.editBtnValue = "保存";
                            this.tempDept.dname = dept.dname;
                            this.tempDept.loc = dept.loc;

                        }else{
                            dept.edit = false;
                            dept.editBtnValue = "编辑";

                            dept.dname = this.tempDept.dname;
                            dept.loc = this.tempDept.loc;
                        }

                    },
                    cancel(dept,index){
                        dept.edit = false;
                        dept.editBtnValue = "编辑";
                    }
                }
            });
        </script>
    </body>
</html>
vue3实现
<template>
员工管理
  <table border="1" width="500">
    <tr v-for="emp,index in emps" :key="emp.empno">
      <template v-if="emp.edit">
        <td>{emp.empno}</td>
        <td><input type="text" v-model="copyEmps[index].ename"></td>
        <td><input type="text" v-model="copyEmps[index].sal"></td>
        <td>
          <input type="button" value="保存" @click="update(index)">
          <input type="button" value="取消" @click="cancel(index)">
        </td>
      </template>
      <template v-else>
        <td>{emp.empno}</td>
        <td>{emp.ename}</td>
        <td>{emp.sal}</td>
        <td>
          <input type="button" value="编辑" @click="edit(index)">
          <input type="button" value="删除" @click="del(index)">
        </td>
      </template>
    </tr>
  </table>
</template>

<script>
export default {
  name: "Emp",
  data(){
    return {
      emps:[
        {empno:1,ename:"tom",sal:3000},
        {empno:2,ename:"scott",sal:2000},
        {empno:3,ename:"marry",sal:3300}
      ],
      copyEmps:[]
    }
  },
  created() {
      //初始化的时候,复制员工数组
    let s = JSON.stringify(this.emps);
    this.copyEmps = JSON.parse(s);
  },
  methods:{
    edit(index){
      this.emps[index].edit = true
    },
    update(index){
      this.emps[index].edit = false
      this.emps[index] = {...this.copyEmps[index]}//克隆元素
    },
    cancel(index){
      this.emps[index].edit = false
      this.copyEmps[index] = {...this.emps[index]}
    },
    del(index){
      if(confirm("是否删除")){
        this.emps.splice(index,1)
        this.copyEmps.splice(index,1)
      }
    }
  }
}
</script>

<style scoped>

</style>
计算属性
作用:处理一些复杂逻辑
计算属性将基于它们的响应依赖关系缓存。
计算属性只会在相关响应式依赖发生改变时重新求值。
        <div id="app">
            商品单价:<input type="text" v-model="price"><br>
            商品数量:<input type="text" v-model="num"><br>
            总额:{total}
        </div>
        <script type="text/javascript">
            var app = new Vue({
                el:"#app",
                data:{
                    username:"marry",
                    price:'',
                    num:''
                },
                computed:{
                    un(){
                        return this.username.toUpperCase();
                    },
                    total(){
                        return this.price * this.num;
                    }
                }
            });
        </script>
vue3
<div id="app">
  商品单价:<input type="text" v-model="price"><br>
  商品数量:<input type="text" v-model="num"><br>
  总额:{total}
</div>

computed:{
      total(){
          return this.total = this.price * this.num;
      }
    }
上面的方式会产生一个警告:

计算属性默认只有 getter,不过在需要时你也可以提供一个 setter:
<!DOCTYPE html>
<html lang="en">
<head>
  <meta charset="UTF-8">
  <title>Title</title>
  <script src="https://unpkg.com/vue@next"></script>
</head>
<body>
<div id="app">
  商品单价:<input type="text" v-model="price"><br>
  商品数量:<input type="text" v-model="num"><br>
  总额:{total}
</div>

<script>
  const config = {
    name:"root",
    data(){
      return {
        price:'',
        num:''
      }
    },
    computed:{
      total:{
        get(){
          return this.total = this.price * this.num;
        },
        set(newValue){

        }
      }
    }
  }

  //Vue.createApp(config):基于config配置对象,创建一个Vue应用实例
  //mount("#app"):把Vue实例挂载到id为app的div上
  const app = Vue.createApp(config)
  const vm = app.mount("#app");
</script>

</body>
监听属性
可以通过watch来响应数据的变化
当需要在数据变化时执行异步或开销较大的操作时,这个方式是最有用的。
        <div id="app">
            <input type="text" v-model="km">千米<br>
            <input type="text" v-model="m">米<br>
        </div>
        <script type="text/javascript">
            var app = new Vue({
                el:"#app",
                data:{
                    km:'',
                    m:''
                },
                watch:{
                    km(newValue,oldValue){
                        this.m = newValue * 1000;
                    },
                    m(newValue,oldValue){
                        this.km = newValue/1000;
                    }
                }
            });
        </script>
监听对象
<body>
        <div id="app">
            商品单价:<input type="text" v-model="good.price"><br>
            商品数量:<input type="text" v-model="good.num"><br>
            总额:<span v-if="!isNaN(good.total)">{good.total}</span>
        </div>
        <script type="text/javascript">
            var app = new Vue({
                el:"#app",
                data:{
                    good:{

                    }
                }
                watch:{
                    good:{
                        //handle方法名固定
                        handler(newValue,oldValue){
                            newValue.total = newValue.price * newValue.num;
                        },
                        deep:true
                    }
                }
            });
        </script>
    </body>
vue3
<!DOCTYPE html>
<html lang="en">
<head>
  <meta charset="UTF-8">
  <title>Title</title>
  <script src="https://unpkg.com/vue@next"></script>

</head>
<body>
<div id="app">
  商品单价:<input type="text" v-model="good.price"><br>
  商品数量:<input type="text" v-model="good.num"><br>
  总额:<span v-if="!isNaN(good.total)">{good.total}</span>
</div>

<script>
  const config = {
    name:"root",
    data(){
      return {
        good:{}
      }
    },
    watch:{
      good:{
        handler(newValue,oldValue){
          this.good.total = this.good.price * this.good.num;
        },
        deep:true
      }
    }
  }
  const app = Vue.createApp(config)
  const vm = app.mount("#app");
</script>

</body>
</html>
v-model参数特性
lazy:在默认情况下,v-mode在每次 input 事件触发后,将输入框的值与数据同步,可以使用 lazy 修饰符,从而转变为使用 change 事件进行同步
    <body>
        <div id="app">
            <input type="text" v-model.lazy="km">千米<br>
            <input type="text" v-model="m">米<br>
        </div>
        <script type="text/javascript">
            var app = new Vue({
                el:"#app",
                data:{
                    km:'',
                    m:''
                },
                watch:{
                    km(newValue,oldValue){
                        this.m = newValue * 1000;
                    },
                    m(newValue,oldValue){
                        this.km = newValue/1000;
                    }
                }
            });
        </script>
    </body>
number:如果想自动将用户输入值类型转换为数值类型,可以使用number修饰符
可通过vue开发者工具查看对象数据类型
<input type="text" v-model.number="km">千米<br>trim:自动过滤用户输入的首尾空白符,使用trim去掉首尾空白符
可通过vue开发者工具查看对象数据类型
        <div id="app">
            <input type="text" v-model.trim="msg">
        </div>
        <script type="text/javascript">
            var app = new Vue({
                el:"#app",
                data:{
                    msg:'tom'
                }
            });
        </script>
样式绑定
绑定 class 类样式(值是一个对象)
<!DOCTYPE html>
<html>
    <head>
        <meta charset="utf-8">
        <title></title>
        <script src="js/vue.js" type="text/javascript" charset="utf-8"></script>
        <style>
            .class1{
                color:red;
            }
            .class2{
                font-size: 40px;
            }
        </style>
    </head>
    <body>
        <div id="app">
            <div :class="{class1:class1Style,class2:class2Style}">
                动态样式
            </div>
        </div>
        <script type="text/javascript">
            var app = new Vue({
                el:"#app",
                data:{
                    class1Style:true,
                    class2Style:true
                }
            });
        </script>
    </body>
</html>
可以把一个数组传递给class属性
<!DOCTYPE html>
<html>
    <head>
        <meta charset="utf-8">
        <title></title>
        <script src="js/vue.js" type="text/javascript" charset="utf-8"></script>
        <style>
            .class1{
                color:red;
            }
            .class2{
                font-size: 40px;
            }
        </style>
    </head>
    <body>
        <div id="app">
            <div :class="[class1Style,class2Style]">
                动态样式
            </div>
        </div>
        <script type="text/javascript">
            var app = new Vue({
                el:"#app",
                data:{
                    class1Style:'class1',
                    class2Style:"class2"
                }
            });
        </script>
    </body>
</html>
style对象语法
        <div id="app">
            <div :style="{'color':color,'font-size':size}">
                动态样式
            </div>
        </div>
        <script type="text/javascript">
            var app = new Vue({
                el:"#app",
                data:{
                    color:'blue',
                    size:'50px'
                }
            });
        </script>
style数组语法
        <div id="app">
            <div :style="[style1,style2]">
                动态样式
            </div>
        </div>
        <script type="text/javascript">
            var app = new Vue({
                el:"#app",
                data:{
                    style1:{'color':'red'},
                    style2:{'font-size':'20px'}
                }
            });
        </script>
定时器使用案例
<!DOCTYPE html>
<html>
    <head>
        <meta charset="utf-8">
        <title></title>
        <script src="js/vue.js" type="text/javascript" charset="utf-8"></script>

    </head>
    <body>
        <div id="app">
            <div>{name}</div>
            <input type="button" value="开始" @click="startGame">
            <input type="button" value="停止" @click="stopGame">
        </div>
        <script type="text/javascript">
            var app = new Vue({
                el:"#app",
                data:{
                    name:'请选择',
                    arr:["唐僧","悟空","八戒","沙僧","小白龙"],
                    t:'',
                    index:0
                },
                methods:{
                    startGame(){
                        this.index = parseInt(Math.random()*this.arr.length);
                        this.name = this.arr[this.index];

                        this.t = setTimeout(this.startGame,100);
                    },
                    stopGame(){
                        clearTimeout(this.t);
                        this.arr.splice(this.index,1);
                    }
                }
            });
        </script>
    </body>
</html>
vue3
<!DOCTYPE html>
<html lang="en">
<head>
  <meta charset="UTF-8">
  <title>摇奖</title>
  <script src="https://unpkg.com/vue@next"></script>
  <style>
    #style1{
      color:blue;
      font-size: 180px;
      text-align: center;
    }
  </style>
</head>
<body>
<div id="app">
  <div id="style1">{name}</div>
  <input type="button"  value="开始" @click="startGame" ref="startGame">
  <input type="button"  value="结束" @click="endGame" ref="endGame">
</div>

<script>
  const config = {
    data(){
      return {
        stus:["张三","李四","王五","赵六","马七"],
        name:'请选择',
        t:null,
        index:'',
        b:false
      }
    },
    methods:{
      startGame(){
        this.$refs.endGame.focus();
        if(this.stus.length > 0){
          this.index = parseInt(Math.random()*this.stus.length)

          this.name = this.stus[this.index];

          this.t = setTimeout(this.startGame,100)
        }else{
          alert("摇奖结束")
        }

      },
      endGame(){
        clearTimeout(this.t)

        this.stus.splice(this.index,1)
        this.$refs.startGame.focus();
      }
    },
    mounted() {
      this.$refs.startGame.focus();
    }
  }

  Vue.createApp(config).mount("#app")
</script>
</body>
</html>
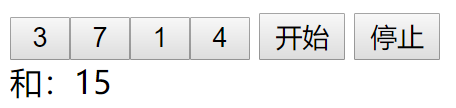
定时器练习
点击开始按钮,随机生成4个各不相同的数,并滚动显示
点击停止按钮的时候,求和
<!DOCTYPE html>
<html lang="en">
<head>
    <meta charset="UTF-8">
    <title>vuedemo</title>
    <script src="js/vue.js"></script>
</head>
<body>
    <div id="app">
        <div>
            <input type="button" v-for="num in arr" :value="num">
            和:{sum}
        </div>
        <input type="button" value="开始" @click="startGame">
        <input type="button" value="结束" @click="stopGame">

    </div>
    <script>

    //vue的配置对象
    let config = {
        data(){
            return {
                arr:[0,0,0,0],
                t:-1,//定时器
                sum:0
            }
        },
        methods:{
            startGame(){
                this.arr.length = 0;
                this.sum = ''
                /*for(let i = 0;i < 4;i++){
                    let n = parseInt(Math.random()*10);
                    this.arr.push(n);
                }*/
                //生成各不相同的4个数
                while(true){
                    let n = parseInt(Math.random()*10);
                    if(this.arr.indexOf(n) == -1){
                        this.arr.push(n);
                    }

                    if(this.arr.length == 4) break;
                }

                this.t = setTimeout(this.startGame,100)
            },
            stopGame(){
                clearTimeout(this.t)
                this.sum = 0;
                for(let i = 0;i < 4;i++){
                    this.sum += this.arr[i]
                }
            }
        }
    }
    //createApp方法返回一个应用程序对象
    const app = Vue.createApp(config);
    const p = app.mount("#app")
    </script>
</body>
</html>
vue3键盘事件
Vue 提供了绝大多数常用的按键码的别名:
.enter.tab.delete(捕获“删除”和“退格”键).esc.space.up.down.left.right
使用
@keyup.enter=showInfo
@keydown.tab=showInfo
登录案例
回车触发登录
<!DOCTYPE html>
<html lang="en">
<head>
  <meta charset="UTF-8">
  <title>登录</title>
  <script src="https://unpkg.com/vue@next"></script>
  <style>
    #style1{
      color:blue;
      font-size: 180px;
      text-align: center;
    }
  </style>
</head>
<body>
<div id="app">
  <div @keyup.enter="login">
    <input type="text" placeholder="手机号码">
    <input type="text" placeholder="密码">
    <button  @click="login" >登录</button>
  </div>
</div>

<script>
  const config = {
    data(){
      return {
      }
    },
    methods:{
      login(){
        console.log("login")
      }
    }
  }

  Vue.createApp(config).mount("#app")
</script>
</body>
</html>
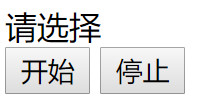
游戏案例
在document对象上触发onkeydown事件
<!DOCTYPE html>
<html lang="en">
<head>
  <meta charset="UTF-8">
  <title>游戏</title>
  <script src="https://unpkg.com/vue@next"></script>
  <style>
    #style1{
      color:blue;
      font-size: 180px;
      text-align: center;
    }
  </style>
</head>
<body>
<div id="app">
  <div id="style1">
    请选择
  </div>
</div>

<script>
  const config = {
    data(){
      return {
      }
    },
    methods:{
      keyDown(e){
        if(e.code == "Enter"){
          this.startGame()
        }else if(e.code == "Space"){
          this.endGame()
        }
      },
      startGame(){
        alert("开始游戏")
      },
      endGame(){
        alert("结束游戏")
      }
    },
    created(){
      document.addEventListener("keydown",this.keyDown);
    }
  }

  Vue.createApp(config).mount("#app")
</script>
VueCli
vue.js开发的标准工具
Node.js:是一个基于 Chrome V8引擎的 JavaScript运行时环境(需要安装)
npm:是随着node.js一起安装的包管理工具,允许用户从npm服务器下载别人编写好的第三方包到本地
测试:npm –version
配置npm源:
npm config set registry http://192.168.1.190:5001/repository/dhee-group-npm/

外网
npm config set registry http://registry.npm.taobao.org/
安装vuecli
npm i -g @vue/cli@4.5.13

//安装最新版
npm i -g @vue/cli
创建项目
vue create 项目名
单页面应用
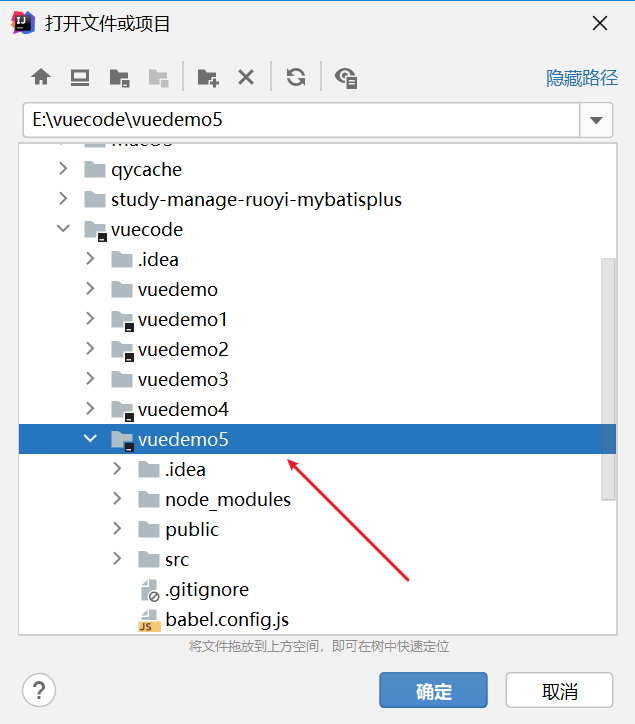
在Idea中打开项目

选择上面创建好的Vue项目
运行项目
npm run serve
组件
定义:可以复用的Vue实例,且带有一个名字
使用
定义组件
            const mybtn = {
                template:
                `
                <button type="button" @click="add">点击 {num}</button>
                `,
                //data必须是一个方法
                data(){
                    return{
                        num:0
                    }
                },
                methods:{
                    add(){
                        this.num++;
                    }
                }
            };

            const mybtn = Vue.extend({

            });
注册
全局注册
Vue.component("mybtn",mybtn);局部注册
            var app = new Vue({
                el:"#app",
                data:{

                },
                components:{
                    "mybtn":mybtn//简写:mybtn
                }
            });
使用
<div id="app">
    <mybtn></mybtn>
</div>
vue3,在Vue-cli中全局注册
import { createApp } from 'vue'
import App from './App.vue'
import Demo1 from "./components/Demo1";

const app = createApp(App)
//全局注册组件
app.component("Demo1",Demo1)
app.mount('#app')
任意组件中使用
<template>
  <Demo1></Demo1>
</template>
vue3局部注册同vue2相同
vue组件命名(非单文件组件中)
在模板中(挂载点)的标签名(组件名),使用短横线命名法(单词之间用短横线分隔),所有字符小写
template编写方法
直接写到vue实例对象中
使用标签
        <template id="btn">
            <button type="button" @click="add">点击 {num}</button>
        </template>
        <script type="text/javascript">
            const mybtn = {
                template:"#btn",
                data(){
                    return{
                        num:0
                    }
                },
                methods:{
                    add(){
                        this.num++;
                    }
                }
            };
            //全局注册
            // Vue.component("myBtn",mybtn);
            var app = new Vue({
                el:"#app",
                data:{

                },
                components:{
                    "myBtn":mybtn
                }
            });
        </script>
父组件向子组件传值
使用 prop 属性向组件传值,在组件中定义属性接收值
//父组件
<my-btn num="10"></my-btn>

//子组件
        <template id="btn">
            <button type="button" @click="add">点击 {num}</button>
        </template>
            const mybtn = {
                template:"#btn",
                data(){
                    return{
                        n:''
                    }
                },
                created(){
                    this.n = this.num;//初始同步
                },
                methods:{
                    add(){
                        this.n++;
                    }
                },
                props:[
                    "num"
                ]
            };
在子组件中,可以向使用data的属性一样,来使用props中的属性
注意:在子组件中不要去改变属性的值
通过 自定义事件 子组件向父组件传值
在 子组件中 触发自定义事件(什么时候想向父组件传值,什么时候触发)
this.$emit("retval",this.n);父组件中,订阅子组件触发的自定义事件
<my-btn :num="num" @retval="getValue($event)"></my-btn>注意:自定义的事件名与组件命名规则相同
vue3
子组件
<template>
  Demo1
  <button @click="send">传递值</button>
</template>

<script>
export default {
  name: "Demo1",
  props:[
      "num"
  ],
  //声明可以触发的事件列表
  emits:[
    'retval'
  ],
  data(){
    return {
      age:22
    }
  },
  methods:{
    send(){
      this.$emit("retval",this.age);
    }
  }
}
</script>

<style scoped>

</style>
父组件
<template>
  <Demo1 num="10" @retval="getAge($event)"></Demo1>
</template>

<script>
export default {
  name: 'App',
  components: {

  },
  methods:{
    getAge(age){
      console.log(age)
    }
  }
}
</script>
组件传值综合练习

<!DOCTYPE html>
<html lang="en">
<head>
    <meta charset="UTF-8">
    <title>Title</title>
    <script src="js/vue.js"></script>
</head>
<body>
<div id="app">
    <div>
        <child v-for="q in n" :endval="endval" :isstart="isstart" @myevent="getVal($event)" style="width:30px"></child>
        <div>
            <input type="button" value="开始" @click="isstart=true" >
            <input type="button" value="停止" @click="isstart=false" >
            和:{sum}
        </div>
    </div>

</div>

<template id="child">
    <input type="button" v-model="num">
</template>
<script>
    let child = {
        template: "#child",
        props: [
            "endval",
            "isstart"
        ],
        created() {
            this.start();
        },
        data() {
            return {
                num: '0',//按钮上默认数字
                b:false//是否已返回数
            }
        },
        methods: {
            start() {
                setTimeout(this.start, 100);//循环执行,始终监听是否重新开始运行
                if (this.isstart) {
                    this.num = parseInt(Math.random() * this.endval) + 1;//产生随机数
                    this.b = false;//重新开始
                }else{
                    if(!this.b){
                        this.$emit("myevent",this.num);//触发自定义事件,并返回数
                        this.b = true//已返回数
                    }
                }
            }
        }
    }
    let app = new Vue({
        el: "#app",
        components: {
            child
        },
        data: {
            isstart: true,//是否开始
            endval: 35,//数字范围
            nums:[],//存储组件返回的数
            sum:0,//和
            n:10,//按钮个数
            i:0//已返回数字的按钮数
        },
        methods:{
            getVal(num){
                this.nums.push(num);//把新产生的数添加到数组中
                this.i++;

                //全部组件都返回数后计算
                if(this.i == this.n){
                    this.sum = 0;//重新开始计算
                    for(let p of this.nums){
                        this.sum += p;
                    }

                    this.nums = [];//重新开始计算
                    this.i = 0;//重新开始计算
                }
            }
        }
    });
</script>
</body>
</html>
vue3的cli实现
ChildCom
接收父组件是否开始的消息和随机数范围
负责把随机生成的数显示在按钮上
接收父组件停止命令,返回此刻产生的随机数给父组件
<template>
  <input type="button" v-model="num">
</template>

<script>
export default {
  name: "ChildCom",
  props: [
    "endval",
    "isstart"
  ],
  created() {
    this.start();
  },
  data() {
    return {
      num: '0',//按钮上默认数字
      b:false//是否已返回数
    }
  },
  emits:[
      "myevent"
  ]
  ,
  methods: {
    start() {
      setTimeout(this.start, 100);//循环执行,始终监听是否重新开始运行
      if (this.isstart) {
        this.num = parseInt(Math.random() * this.endval) + 1;//产生随机数
        this.b = false;//重新开始
      }else{
        if(!this.b){
          this.$emit("myevent",this.num);//触发自定义事件,并返回数
          this.b = true//已返回数
        }
      }
    }
  }
}
</script>

<style scoped>

</style>
父组件:ParentCom
- 控制子组件的开始和结束
- 接收子组件返回的数
- 控制子组件数量
- 求子组件返回数的和
<template>
  <div>
    <ChildCom v-for="q in n" :key="q" :endval="endval" :isstart="isstart" @myevent="getVal($event)" style="width:30px"></ChildCom>
    <div>
      <input type="button" value="开始" @click="isstart=true" >
      <input type="button" value="停止" @click="isstart=false" >
      和:{sum}
    </div>
  </div>
</template>

<script>
import ChildCom from './ChildCom'
export default {
  name: "ParentCom",
  data(){
    return {
      isstart: true,//是否开始
      endval: 35,//数字范围
      nums:[],//存储组件返回的数
      sum:0,//和
      n:20,//按钮个数
      i:0//已返回数字的按钮数
    }
  },
  components:{
    ChildCom
  },
  methods:{
    getVal(num){
      this.nums.push(num);//把新产生的数添加到数组中
      this.i++;

      //全部组件都返回数后计算
      if(this.i == this.n){
        this.sum = 0;//重新开始计算
        for(let p of this.nums){
          this.sum += p;
        }

        this.nums = [];//重新开始计算
        this.i = 0;//重新开始计算
      }
    }
  }
}
</script>

<style scoped>

</style>
App.vue
<template>
  <ParentCom></ParentCom>
</template>

<script>
import ParentCom from "./components/ParentCom";
export default {
  name: 'App',
  components: {
    ParentCom
  },
  methods:{

  }
}
</script>

<style>

</style>
单向数据流讲解
单向数据流(堆可以修改,栈不可修改)
我们都知道, 父传子的数据, 是单向数据流,即子组件不能直接修改, 父组件传递过来的值
但实际上, 对于修改值, 真正是:基本数据类型不可修改,复杂数据类型不要修改引用地址(栈),它的值可以随便修改
向子组件传值,修改后再返回
<!DOCTYPE html>
<html lang="en">
<head>
    <meta charset="UTF-8">
    <title>Title</title>
  <script src="js/vue.js"></script>
</head>
<body>
  <div id="app">
    <child :com-num="num" @myevent="num=$event" ></child>
      <!--<child :com-num.sync="num"></child>-->
      <div>
          {num}
      </div>
  </div>
<template id="child">
    <div>
        <input type="text" :value="comNum">
        <input type="text" v-model="num">
        <input type="button" value="传出" @click="toVal">
    </div>
</template>
  <script>
      let child = {
          template:"#child",
          props:[
              "comNum"
          ],
          data(){
              return {
                  num:''
              }
          },
          methods: {
              toVal(){
                  // this.$emit("update:comNum",this.num)
                  this.$emit("myevent",this.num)
              }
          }
      }
    var app = new Vue({
      el:"#app",
      data:{
        num:10
      },
        components:{
          child
        }
    });
  </script>
</body>
</html>
简化写法:
<!DOCTYPE html>
<html lang="en">
<head>
    <meta charset="UTF-8">
    <title>Title</title>
    <script src="js/vue.js"></script>
</head>
<body>
<div id="app">
    <!--<child :com-num="num" @myevent="num=$event" ></child>-->
    <!--.sync表示异步修改,需要组件内支持,即自定义事件名为:update:组件属性名-->
    <child :com-num.sync="num"></child>
    <div>
        {num}
    </div>
</div>
<template id="child">
    <div>
        <input type="text" :value="comNum">
        <input type="text" v-model="num">
        <input type="button" value="传出" @click="toVal">
    </div>
</template>
<script>
    let child = {
        template: "#child",
        props: [
            "comNum"
        ],
        data() {
            return {
                num: ''
            }
        },
        methods: {
            toVal() {
                //update:comNum中的comNum与属性名相同,前缀固定为update
                this.$emit("update:comNum", this.num)
                // this.$emit("myevent",this.num)
            }
        }
    }
    var app = new Vue({
        el: "#app",
        data: {
            num: 10
        },
        components: {
            child
        }
    });
</script>
</body>
</html>
vue3中cli实现
如果直接修改父组件传递过来的属性,vue3中会报错:Unexpected mutation of “sonProp” prop vue/no-mutating-props(不能修改的属性)
change(){
      this.sonProp = this.sonProp + 1;//报错
}
写法一
子组件:Child1
<template>
  <div>{sonProp}</div>
  <button @click="change">返回</button>
</template>

<script>
export default {
  name: "Child1",
  props:[
      "sonProp"
  ],
  emits:[
      "retVal"
  ],
  methods:{
    change(){
      this.$emit("retVal",this.sonProp+1);
    }
  },
  data(){
    return{

    }
  }
}
</script>
父组件:Parent1
<template>
  <Child1 :sonProp="num" @retVal="num=$event"></Child1>
</template>

<script>
import Child1 from './Child1'
export default {
  name: "Parent1",
  components:{
    Child1
  },
  data(){
    return{
      num:0
    }
  }
}
</script>
简化写法
子组件:Child1
<template>
  <div>{sonProp}</div>
  <button @click="change">返回</button>
</template>

<script>
export default {
  name: "Child1",
  props:[
      "sonProp"
  ],
  emits:[
      "update:sonProp"
  ],
  methods:{
    change(){
      this.$emit("update:sonProp",this.sonProp+1);
    }
  },
  data(){
    return{

    }
  }
}
</script>
父组件:Parent1
<template>
  <Child1 v-model:sonProp="num"></Child1>
</template>

<script>
import Child1 from './Child1'
export default {
  name: "Parent1",
  components:{
    Child1
  },
  data(){
    return{
      num:0
    }
  }
}
</script>
App.vue
<template>
  <Parent1></Parent1>
</template>

<script>
import Parent1 from "./components/Parent1";
export default {
  name: 'App',
  components: {
    Parent1
  }
}
</script>
多属性
子组件:Child1
<template>
  <div>{sonProp}</div>
  <div>{prop2}</div>
  <button @click="change">返回</button>
</template>

<script>
export default {
  name: "Child1",
  props:[
      "sonProp",
      "prop2"
  ],
  emits:[
      "update:sonProp",
      "update:prop2"
  ],
  methods:{
    change(){
      this.$emit("update:sonProp",this.sonProp+1);
      this.$emit("update:prop2",this.prop2+2);
    }
  },
  data(){
    return{

    }
  }
}
</script>
父组件:Parent1
<template>
  <Child1 v-model:sonProp="num" v-model:prop2="num2"></Child1>
</template>

<script>
import Child1 from './Child1'
export default {
  name: "Parent1",
  components:{
    Child1
  },
  data(){
    return{
      num:0,
      num2:100
    }
  }
}
</script>
插槽
需求:组件间传递值比较麻烦,有的时候,仅仅需要把父组件的值显示到子组件的可视范围内
匿名插槽:<slot></slot>,只能有一个
<body>
<div id="app">
    <child>{msg}</child>
</div>
<template id="child">
    <div>
        <hr>
        <!-- 引用父组件的值 -->
        <slot></slot>
        <hr>
    </div>
</template>
<script>
    let child = {
        template: "#child"
    }
    let app = new Vue({
        el: "#app",
        data: {
            msg: 'hello'
        },
        components: {
            child
        }
    });
</script>
具名插槽:<slot name="插槽名"></slot>
<!DOCTYPE html>
<html>
<head>
<meta charset="utf-8">
<title></title>
<script src="js/vue.js" type="text/javascript" charset="utf-8"></script>
</head>
<body>
<div id="app">
<child >
<!--为插槽s1赋值-->
<template slot="s1">marry</template>
<template slot="s2">scott</template>
<!--为匿名插槽赋值-->
<template>{msg}</template>
<!--或 {msg}-->
</child>
</div>
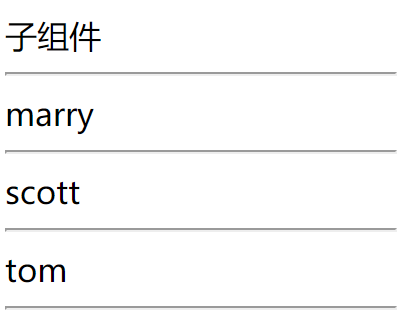
<template id="child">
<div>
子组件
<hr>
<slot name="s1"></slot>
<hr>
<slot name="s2"></slot>
<hr>
<slot></slot>
<hr>
</div>
</template>
<script type="text/javascript">
var child = {
template:"#child"
};
var app = new Vue({
el:"#app",
data:{
msg:"tom"
},
components:{
child
}
});
</script>
</body>
</html>
注意:插槽属于父组件,在子组件中,只能决定放置在哪个地方,不能修改
vue3中cli
匿名插槽
子组件:
<template>
  <hr>
  <slot></slot>
  <hr>
</template>

<script>
export default {
  name: "Child2"
}
</script>
父组件:
<template>
  <Child2>
    <template #default>100</template>
  </Child2>
  或
  <Child2>100</Child2>
</template>

<script>
import Child2 from './Child2'
export default {
  name: "Parent2",
  components:{
    Child2
  }
}
</script>

<style scoped>

</style>
具名插槽
子组件
<template>
  <hr>
  <slot></slot>
  <hr>
  <slot name="name1"></slot>
  <hr>
  <slot name="name2"></slot>

</template>

<script>
export default {
  name: "Child2"
}
</script>
父组件
<template>
  <Child2>
    <template #default>100</template>
    <template #name1>200</template>
    <template #name2>300</template>
  </Child2>
</template>
或
<template>
  <MyDemo3>
    <template v-slot:default>1002</template>
    <template v-slot:name1>200</template>
    <template v-slot:name2>300</template>
  </MyDemo3>
</template>

<script>
import Child2 from './Child2'
export default {
  name: "Parent2",
  components:{
    Child2
  }
}
</script>
作用域插槽
作用:把子组件的值通过插槽属性传递出来,由父组件决定如何显示,并且只在当前插槽中有效
slot-scope:就像一个临时变量,包含了从组件传回的所有属性。
<!DOCTYPE html>
<html lang="en">
<head>
    <meta charset="UTF-8">
    <title>Title</title>
    <script src="js/vue.js"></script>
</head>
<body>
<div id="app">
    <child>
        <template slot-scope="scope" slot="s1">
            <span>姓名:{scope.name1}</span>
            <span>年龄:{scope.age}</span>
        </template>
    </child>
</div>
<template id="child">
    <div>
        <!-- 注意插槽的属性不能为name,否则不显示 -->
        <slot name="s1" :name1="name" :age="age"></slot>
    </div>
</template>
<script>
    let child = {
        template: "#child",
        data(){
            return{
                name:'tom',
                age:20
            }
        }
    }
    let app = new Vue({
        el: "#app",
        data: {
            msg: 'hello'
        },
        components: {
            child
        }
    });
</script>
</body>
</html>
也可以传递对象
<!DOCTYPE html>
<html lang="en">
<head>
    <meta charset="UTF-8">
    <title>Title</title>
    <script src="js/vue.js"></script>
</head>
<body>
<div id="app">
    <child>
        <template slot-scope="scope" slot="s1">
            <span>姓名:{scope.stu.name}</span>
            <span>年龄:{scope.stu.age}</span>
        </template>
    </child>
</div>
<template id="child">
    <div>
        <slot name="s1" :stu="stu"></slot>
    </div>
</template>
<script>
    let child = {
        template: "#child",
        data(){
            return{
                stu:{name:"tom",age:20}//传递对象
            }
        }
    }
    let app = new Vue({
        el: "#app",
        data: {
            msg: 'hello'
        },
        components: {
            child
        }
    });
</script>
</body>
</html>
<!DOCTYPE html>
<html>
<head>
<meta charset="utf-8">
<title></title>
<script src="js/vue.js" type="text/javascript" charset="utf-8"></script>
</head>
<body>
<div id="app">
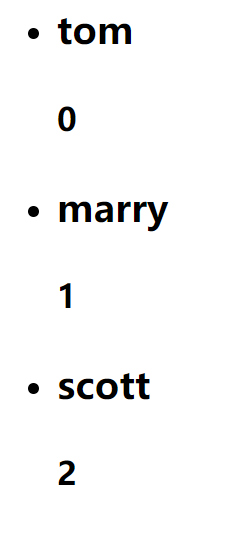
<child :data="arr">
<template slot-scope="scope">
<li><h3>{scope.n}</h3><h4>{scope.i}</h4></li>
</template>
</child>
</div>
<template id="t1">
<div>
<ul>
<slot v-for="(name,index) in data" :n="name" :i="index"></slot>
</ul>
</div>
</template>
<script type="text/javascript">
var child = {
template:"#t1",
props:[
"data"
]
}
var app = new Vue({
el:"#app",
data:{
arr:["tom","marry","scott"]
},
components:{
child
}
});
</script>
</body>
</html>
vue3中cli实现
子组件
Child3.vue
<template>
  <slot age="20" name2="tom"></slot>
</template>

<script>
export default {
  name: "Child3"
}
</script>
父组件
Parent3.vue
<template>
  <Child3 v-slot="scope">
    {scope.age}-{scope.name2}
  </Child3>
</template>

<script>
import Child3 from "./Child3";

export default {
  name: "Parent3",
  components:{
    Child3
  }
}
</script>
具名作用域插槽
子组件
Child3.vue
<template>
  <slot age="30"></slot>
  <slot name2="tom" name="name1" age="20"></slot>
</template>

<script>
export default {
  name: "Child3"
}
</script>
父组件
Parent3.vue
<template>
  <Child3  >
    <!--  可简写为:#default="scope"   -->
    <template v-slot:default="scope">
      {scope.age}
    </template>
    <!--  可简写为:#name1="scope"   -->
    <template v-slot:name1="scope">
      {scope.name2}-{scope.age}
    </template>
  </Child3>
</template>

<script>
import Child3 from "./Child3";

export default {
  name: "Parent3",
  components:{
    Child3
  }
}
</script>
动态组件
<component :is="com"></component>:com属性的值是一个组件对象
<!DOCTYPE html>
<html>
    <head>
        <meta charset="utf-8">
        <title></title>
        <script src="js/vue.js" type="text/javascript" charset="utf-8"></script>

    </head>
    <body>
        <div id="app">
            <component :is="com"></component>
            <button type="button" @click="getCom">切换组件</button>
        </div>
        <script type="text/javascript">
            var com1 = {
                template:`<div>组件1</div>`
            }
            var com2 = {
                template:`<div>组件2</div>`
            }
            var app = new Vue({
                el:"#app",
                data:{
                    com:com2
                },
                components:{
                    com1,com2
                },
                methods:{
                    getCom(){
                        this.com = com1;
                    }
                }
            });
        </script>
    </body>
</html>
vue3中cli实现
子组件
Child4,child5
<template>
  <div>子组件4</div>
</template>

<template>
  <div>子组件5</div>
</template>
父组件
Parent4
<template>
  <component :is="com"></component>
  <button @click="change">更换组件</button>
</template>

<script>
import Child4 from './Child4'
import Child5 from './Child5'
import {markRaw} from 'vue'
export default {
  name: "Parent4",
  components:{
    Child4,Child5
  },
  data(){
    return {
     //markRaw:把该组件变为非响应式的,否则会有警告
      com:markRaw(Child4)
    }
  },
  methods:{
    change(){
      if(this.com.name =="Child4"){
        this.com = markRaw(Child5)
      }else{
        this.com = markRaw(Child4)
      }
    }
  }
}
</script>
路由
作用:在应用中切换组件
使用
创建组件
导入路由文件
<script src="js/vue-router.js" type="text/javascript" charset="utf-8"></script>创建路由器实例,配置路由器
            var router = new VueRouter({
                //路由表
                routes:[
                    //路由
                    {
                        path:'/login',
                        component:login
                    },
                    {
                        path:'/main',
                        component:main
                    }
                ]
            });
注册路由器
            var app = new Vue({
                el:"#app",
                data:{

                },
                router
            });
<router-link to="/login">登录页</router-link>:功能类似于超链接,用来链接组件<router-view></router-view>:用来显示组件使用代码切换组件
this.$router.push("/main");显示第一个组件
//配置路由
 {
     path:'/',
     component:login
 }

 //通过代码
             var app = new Vue({
                el:"#app",
                data:{

                },
                router,
                created(){
                    this.$router.push("/login");
                }

            });
命名路由
                    {
                        path:'/login',
                        name:"login",
                        component:login
                    },
                    {
                        path:'/main',
                        name:"main",
                        component:main
                    }
使用路由名子切换组件
this.$router.push({name:'login'}).catch(()=>{});嵌套路由
            var router = new VueRouter({
                //路由表
                routes:[
                    //路由
                    /* {
                        path:'/',
                        component:login
                    }, */
                    {
                        path:'/login',
                        name:"login",
                        component:login
                    },
                    {
                        path:'/main',
                        name:"main",
                        component:main,
                        children:[
                            {
                                path:'/dept',
                                name:'dept',
                                component:dept
                            },
                            {
                                path:'/emp',
                                name:'emp',
                                component:emp
                            }
                        ]
                    }
                ]
            });
<!DOCTYPE html> <html> <head> <meta charset="utf-8"> <title></title> <script src="js/vue.js" type="text/javascript" charset="utf-8"></script> <script src="js/vue-router.js" type="text/javascript" charset="utf-8"></script> <style> #parent{ width: 800px; height:500px; display: flex; } #nav{ width:100px; height:500px; background-color: bisque; } #main{ width:600px; height:500px; background-color: aliceblue; } </style> </head> <body> <div id="app"> <!-- <router-link to="/login">登录页</router-link> <router-link to="/main">主页</router-link> --> <router-view></router-view> </div> <script type="text/javascript"> var login = { template:` <div> <h1>登录页</h1> <input type="button" value="登录" @click="login"> </div> `, methods:{ login(){ this.$router.push("/main"); } } } var main = { template:` <div> <h1>主页</h1> <div id="parent"> <div id="nav"> <h4>导航</h4> <router-link to="/dept">部门管理</router-link><br> <router-link to="/emp">员工管理</router-link> </div> <div id="main"> <h4>主区域</h4> <router-view></router-view> </div> </div> </div> ` } var dept = { template:`<div><h2>部门管理</h2></div>` } var emp = { template:`<div><h2>员工管理</h2></div>` } var router = new VueRouter({ //路由表 routes:[ //路由 /* { path:'/', component:login }, */ { path:'/login', name:"login", component:login }, { path:'/main', name:"main", component:main, children:[ { path:'/dept', name:'dept', component:dept }, { path:'/emp', name:'emp', component:emp } ] } ] }); var app = new Vue({ el:"#app", data:{ }, router, created(){ // this.$router.push("/login"); this.$router.push({name:'login'}).catch(()=>{}); } }); </script> </body> </html>
路由传参
向切换后的组件传递参数
动态路由
//路由表
{
    path:'/dept/:deptno',
    name:'dept',
    component:dept
}

//router-link
<router-link to="/dept/10">部门管理</router-link>
//代码
this.$router.push({path:'/editdept/20/hr5'});

//在组件中得到路由参数
{$route.params.deptno}

this.deptno = this.$route.params.deptno;
//路由表 { path:'/dept', component:dept } //router-link <router-link :to="{path:'/update_dept',query:{'deptno':dept.deptno}">更新</router-link> //在组件中得到路由参数 {$route.query.deptno} this.deptno = this.$route.query.deptno;查询参数(查询参数会显示在地址栏中)
//路由表
{
    path:'/dept',
    name:'dept',
    component:dept
}

发送数据:
this.$router.push({name:'main',query:{username:'admin',age:20});

接收数据:
{$route.query.username}

this.username = this.$route.query.username;
通过 name 和 params 结合传递参数(地址栏中不显示参数数据)
//路由表
{
    path:'/dept',
    name:'dept',
    component:dept
}

发送数据:
this.$router.push({name:'main',params:{username:'admin',age:20});

接收数据:
{$route.params.username}

this.username = this.$route.params.username;
注意:path不能与params同时使用,params会被忽略掉
Vue-Cli
vue.js开发的标准工具
Node.js:是一个基于 Chrome V8引擎的 JavaScript运行时环境
npm:是随着node.js一起安装的包管理工具,允许用户从npm服务器下载别人编写好的第三方包到本地
测试:npm –version
安装 cnpm
npm install -g cnpm --registry=http://registry.npm.taobao.org安装 Vue-Cli
cnpm install -g @vue/cli启动项目
npm run serve安装路由(脚手架插件)
vue add router或
npm(cnpm) install vue-router
Axios
安装:
vue add axios定义:易用、简洁且高效的http库
作用:用户向后台服务器发送异步请求,并处理响应的结果
配置:
//基础路径配置
axios.defaults.baseURL="http://localhost:8089/"
//允许传递证书
axios.defaults.withCredentials=true
get请求
var url = `emp/getPaged?pageNum=${pageNum}&pageSize=${pageSize}`;
axios.get(url).then((resp)=>{
    console.log(resp);
});
var url = `emp/getPaged`; var params = { pageNum:pageNum, pageSize:pageSize } axios.get(url,{params:params}).then((resp)=>{ console.log(resp); });post请求
var url = `emp/getPaged`;
                axios.post(url,`pageNum=${pageNum}&pageSize=${pageSize}`).then((resp)=>{
     console.log(resp);
});
@RequestMapping("update") public int update(@RequestBody Emp emp) { return empService.update(emp); } update(){ var url = "emp/update"; //this.empVO.emp:为JSON对象 axios.post(url,this.empVO.emp).then((resp)=>{ if(resp.data == 1){ alert("更新成功!"); this.$router.push("/emp") } }); }
Axios-vue3
定义:易用、简洁且高效的http库
安装
npm install axios配置
/src/main.js

import axios from 'axios'

axios.defaults.baseURL = "http://localhost:8090/"
//允许传递证书
axios.defaults.withCredentials = true

const app = createApp(App);

app.config.globalProperties.$http = axios
springboot添加允许跨域请求
package com.dhee.springbootdemo1;

import org.springframework.context.annotation.Configuration;
import org.springframework.web.servlet.config.annotation.CorsRegistry;
import org.springframework.web.servlet.config.annotation.WebMvcConfigurer;

//表示当前类是一个spring配置类
@Configuration
public class SpringMVCConfig implements WebMvcConfigurer {

    @Override
    public void addCorsMappings(CorsRegistry registry) {
        registry.addMapping("/**")
                .allowCredentials(true)
                .allowedHeaders("*")
                .allowedMethods("*")
                .allowedOriginPatterns("*");
    }
}
get请求
let url = `user/login?username=${this.user.username}&password=${this.user.password}`;

        this.$http.get(url).then((resp)=>{
          if(resp.data != null && resp.data != ""){
            sessionStorage.setItem("username","admin")

            // alert("登录成功");
            //向路由器中路径的历史记录中添加一条记录
            this.$router.push("/main");
          }else{
            alert("登录失败!")
          }
        })
let url = `user/login`; this.$http.get(url,{params:this.user}).then((resp)=>{ if(resp.data != null && resp.data != ""){ sessionStorage.setItem("username","admin") // alert("登录成功"); //向路由器中路径的历史记录中添加一条记录 this.$router.push("/main"); }else{ alert("登录失败!") } })post请求
this.$http.post("dept/update2",`deptno=${this.dept.deptno}&dname=${this.dept.dname}&loc=${this.dept.loc}`)
        .then((resp)=>{
          if(resp.data == 1){
            this.$router.push("/main/dept")
          }else{
            alert("修改失败")
          }
        })
this.$http.post("dept/update2",this.dept) .then((resp)=>{ if(resp.data == 1){ this.$router.push("/main/dept") }else{ alert("修改失败") } }) //服务器端 @RequestMapping("update2") @ResponseBody public int update2(@RequestBody Dept dept){ return deptService.update(dept); }封装axios
request/index.js
import axios from 'axios'

// 创建一个 axios 实例
const service = axios.create({
    baseURL: 'http://localhost:8089/', // 所有的请求地址前缀部分
    timeout: 60000, // 请求超时时间毫秒
    withCredentials: true, // 异步请求携带cookie
    headers: {
        // 设置后端需要的传参类型
        'Content-Type': 'application/json',
        // 'token': 'your token',
        'X-Requested-With': 'XMLHttpRequest',
    },
})

// 添加请求拦截器
service.interceptors.request.use(
    function (config) {
        // 在发送请求之前做些什么
        return config
    },
    function (error) {
        // 对请求错误做些什么
        console.log(error)
        return Promise.reject(error)
    }
)

// 添加响应拦截器
service.interceptors.response.use(
    function (response) {
        // console.log(response)
        // 2xx 范围内的状态码都会触发该函数。
        // 对响应数据做点什么
        // dataAxios 是 axios 返回数据中的 data
        const dataAxios = response.data
        // 这个状态码是和后端约定的
        // const code = dataAxios.reset
        return dataAxios
    },
    function (error) {
        // 超出 2xx 范围的状态码都会触发该函数。
        // 对响应错误做点什么
        console.log(error)
        return Promise.reject(error)
    }
)

export default service
main.js
import { createApp } from 'vue'
import App from './App.vue'
import  Router from "./router/index";
import store from './store/index'

import axios from './request/index'

const app = createApp(App)

app.config.globalProperties.$http = axios

app.use(Router)
app.use(store)
app.mount('#app')
Dept.vue
created() {
    let url = 'dept/getAll';
    this.$http(url).then(data=>{
      console.log(data)
      this.depts = data;
    });
  }
axios拦截器
拦截器介绍
一般在使用axios时,会用到拦截器的功能,一般分为两种:请求拦截器、响应拦截器。
请求拦截器 在请求发送前进行必要操作处理,例如添加统一cookie、请求体加验证、设置请求头等,相当于是对每个接口里相同操作的一个封装;
响应拦截器 同理,响应拦截器也是如此功能,只是在请求得到响应之后,对响应体的一些处理,通常是数据统一处理等,也常来判断登录失效等。
比如一些网站过了一定的时间不进行操作,就会退出登录让你重新登陆页面,当然这不用拦截器你或许也可以完成这功能,但是会很麻烦而且代码会产生大量重复,所以我们需要用到拦截器
应用场景
1:每个请求都带上的参数,比如token,时间戳等。
2:对返回的状态进行判断,比如token是否过期
axios的拦截器作用非常大。axios的拦截器分为请求拦截器跟响应拦截器,都是可以设置多个请求或者响应拦截。每个拦截器都可以设置两个拦截函数,一个为成功拦截,一个为失败拦截。在调用axios.request()之后,请求的配置会先进入请求拦截器中,正常可以一直执行成功拦截函数,如果有异常会进入失败拦截函数,并不会发起请求;调起请求响应返回后,会根据响应信息进入响应成功拦截函数或者响应失败拦截函数。
因此,我们可以在拦截器中处理一些请求的统一处理。比如在请求拦截器中设置请求头,处理统一的请求数据,在响应拦截去中根据响应状态码做统一的提示信息,整理响应数据等。
在请求或响应被 then 或 catch 处理前拦截它们。
// 官方用例
// 1.添加请求拦截器
axios.interceptors.request.use(function (config) {
    // 在发送请求之前做些什么
    return config;
  }, function (error) {
    // 对请求错误做些什么
    return Promise.reject(error);
  });
// 2.添加响应拦截器
axios.interceptors.response.use(function (response) {
    // 对响应数据做点什么
    return response;
  }, function (error) {
    // 对响应错误做点什么
    return Promise.reject(error);
  });
1.axios-请求拦截器
目标
什么是请求
什么是axios的请求拦截器
场景
在发起请求之前, 最后对要发送的请求配置对象进行修改
例如: 如果本地有token, 携带在请求头给后台
// 添加请求拦截器--代码实现案例:仅供参考
axios.interceptors.request.use(function (config) {
  // 在发送请求之前做些什么, 如果vuex里有token携带在请求头中
  if (store.state.token.length > 0 && config.headers.Authorization === undefined) {
    // 发起请求之前, 把token携带在请求头上(表明自己身份)
    config.headers.Authorization = 'Bearer ' + store.state.token
  }
  return config
}, function (error) {
  // 对请求错误做些什么
  return Promise.reject(error)
})
所有api接口里以后暂时不用自己携带Headers+Token了,简略代码,统一管理
小结
请求拦截器时候时候执行?
在发起请求最后一刻执行
2.axios-响应拦截器
目标
什么是响应
什么是axios的响应拦截器
场景
在响应回来后, 马上执行响应拦截器函数
例如: 判断是否错误401, 统一进行权限判断
// 添加响应拦截器--代码实现案例:仅供参考
axios.interceptors.response.use(function (response) { // 当状态码为2xx/3xx开头的进这里
    // 对响应数据做点什么
    return response
}, async function (error) { // 响应状态码4xx/5xx进这里
    // 对响应错误做点什么
   if (error.response.status === 401) { // 身份过期/token无效
    //  1.清空vuex的token
    store.commit('setToken', '')
    store.commit('setRefreshToken', '')
    // 2. 清空本地token
    localStorage.removeItem('token')
    localStorage.removeItem('refresh_token')
    //  跳转到登录页面登录
    router.push({
      path: '/login'
    })
  }
    return Promise.reject(error)
})
小结
响应拦截器什么时候执行?
在响应回来以后
什么时候进响应拦截器成功, 什么时候进失败?
2xx/3xx开头的响应状态码进入成功
4xx/5xx开头的响应状态码进入失败
Vuex
安装
npm install --save vuexVuex是Vue的状态管理库,用来管理状态(应用程序中的信息或数据)。它将状态存储在一个中心位置,使得任何组件都很容易与之交互
使用
在src目录下,添加一个文件:store.js,创建Vuex的Store对象
import Vue from 'vue'
import Vuex from 'vuex'

//安装Vuex插件
Vue.use(Vuex)

export default new Vuex.Store({
    state:{
        count:0
    }
})
在main.js,导入 store.js
import { createApp } from 'vue'
import App from './App.vue'
import  Router from "./router/index";
import vuex from './store/index'

const app = createApp(App)

app.use(Router)
app.use(vuex)

app.mount('#app')
在组件中访问
{$store.state.user.username}在组件内,来自store的数据是只读的,不能手工修改,改变 store中数据的唯一途径就是显示的提交mutations
export default new Vuex.Store({
    state:{
        count:10
    },
    mutations:{
        add(state,payload){
            //payload可以是一个对象
            //state.count += payload.num;
            state.count += payload;
        }
    }
})

//this.$store.commit("add",{num:6});
this.$store.commit("add",5);
使用store中的getters,来处理state数据,以便以统一的形式来显示数据
export default new Vuex.Store({
    state:{
        count:10
    },
    mutations:{
        add(state,payload){
            state.count += payload.num;
        }
    },
    getters:{
        formatCount(state){
            return `个数:${state.count}`;
        }
    }
})

{$store.getters.formatCount}
使用 store的 actions,来执行异步状态管理
export default new Vuex.Store({
    state:{
        count:10
    },
    mutations:{
        add(state,payload){
            state.count += payload.num;
        }
    },
    getters:{
        formatCount(state){
            return `个数:${state.count}`;
        }
    },
    actions:{
        add2(context,payload){
            setTimeout(function(){
                context.commit("add",payload);
            },1000)
        }
    }
})

this.$store.dispatch("add2",{num:7});//异步操作
Vuex4
Vuex 是一个专为 Vue.js 应用程序开发的状态管理模式 + 库。它采用集中式存储管理应用的所有组件的状态,并以相应的规则保证状态以一种可预测的方式发生变化。
安装
npm install vuex@next --save使用
在src目录下,添加一个文件夹:store,在其下创建文件:index.js
import {createStore} from 'vuex'

export default createStore({
    state(){
        return {
            user:{username:'tom'}
        }
    }
})
在main.js,导入 store.js
import { createApp } from 'vue'
import App from './App.vue'
import  Router from "./router/index";
import vuex from './store/index'

const app = createApp(App)

app.use(Router)
app.use(vuex)

app.mount('#app')
在组件中访问
{$store.state.user.username}在组件内,来自store的数据是只读的,不能手工修改,改变 store中数据的唯一途径就是显示的提交mutations
export default new Vuex.Store({
    state:{
        count:10
    },
    mutations:{
        add(state,payload){
            //payload可以是一个对象
            //state.count += payload.num;
            state.count += payload;
        }
    }
})

//this.$store.commit("add",{num:6});
this.$store.commit("add",5);
使用store中的getters,来处理state数据,以便以统一的形式来显示数据
export default new Vuex.Store({
    state:{
        count:10
    },
    mutations:{
        add(state,payload){
            state.count += payload.num;
        }
    },
    getters:{
        formatCount(state){
            return `个数:${state.count}`;
        }
    }
})

{$store.getters.formatCount}
使用 store的 actions,来执行异步状态管理
export default new Vuex.Store({
    state:{
        count:10
    },
    mutations:{
        add(state,payload){
            state.count += payload.num;
        }
    },
    getters:{
        formatCount(state){
            return `个数:${state.count}`;
        }
    },
    actions:{
        add2(context,payload){
            setTimeout(function(){
                context.commit("add",payload);
            },1000)
        }
    }
})

this.$store.dispatch("add2",{num:7});//异步操作
路由守卫
在路由切换前,对路由进行检查
通过路由守卫实现修改网页title的功能
在每个路由中添加meta属性,记录title信息
import {createRouter,createWebHashHistory} from "vue-router";

export default createRouter({
    history:createWebHashHistory(),
    routes:[
        {
            path:'/',
            component:()=>import('../components/Login'),
            name:'login',
            meta:{
                title:'登录'
            }
        },
        {
            path:'/main',
            component:()=>import('../components/Main'),
            children:[
                {
                    path:'email',
                    component:()=>import('../components/EmailConfig'),
                    meta:{
                        title:'邮箱设置'
                    }
                },
                {
                    path:'user',
                    components:{
                        default:()=>import('../components/UserConfig'),
                        helper:()=>import('../components/UserHelper')
                    },
                    meta:{
                        title:'用户设置'
                    }
                }
            ]
        }
    ]
})
路由守卫
import { createApp } from 'vue'
import App from './App.vue'
import  Router from "./router/index";
import vuex from './store/index'

const app = createApp(App)

Router.beforeEach((to,from,next)=>{
    window.document.title = to.meta.title;
    next();
})

app.use(Router)
app.use(vuex)
app.mount('#app')
to:路由对象,即将要进入的目标
from:路由对象,当前导航要离开的路由
next:方法,一定要调用,决定后续如何导航处理
- next():继续后续的操作
- next(false):中断当前导航
- next(“/url”):跳转到参数指定的地址
使用路由守卫进行登录检查
login(){
                this.$store.commit('setUser',{username:'admin'})
                this.$router.push("/main");
            }
router.beforeEach((to,from,next)=>{ window.document.title = to.meta.title; if(to.name != "login" && !store.state.user.username){ next("/") } next(); })
路由监听
<div id="nav">
    <h4>导航</h4>
    <router-link to="/dept/10">10部门管理</router-link><br>
    <router-link to="/dept/20">20部门管理</router-link><br>
    <router-link to="/emp">员工管理</router-link>
</div>

{
    path:"/dept/:deptno",
    name:'dept',
    component: ()=> import('./views/Dept.vue'),
    meta:{
        title:"部门管理"
    }
}

watch:{
    $route(to,from){
        this.deptno = this.$route.params.deptno;
    }
}
Storage
- sessionStorage:会话存储,关闭浏览器,信息丢失
- localStorage:本地存储,关闭浏览器,信息还在,存储到硬盘上
- setItem(key,value):value只能是字符串
- getItem(key)
- removeItem(key)
JSON
- JSON.stringify(对象):把对象转换为字符串
- JSON.parse(字符串):把字符串转换为JSON对象
ElementUI
安装
npm i element-ui -S修改main.js
import ElementUI from 'element-ui'
import 'element-ui/lib/theme-chalk/index.css'

//在vue中安装 element-ui插件
Vue.use(ElementUI)
登录页前端
<template>
    <div>
        <el-form class="login-container" :model="user" :rules="rules" ref="loginForm">
            <h3 class="login-title">系统登录</h3>
            <el-form-item prop="username">
                <el-input type="text" v-model="user.username" placeholder="账号"></el-input>
            </el-form-item>
            <el-form-item prop="password">
                <el-input type="password" v-model="user.password" placeholder="密码"></el-input>
            </el-form-item>
            <el-form-item prop="checkCode">
                <img :src="imgUrl"><a href="#" @click="getcode">看不清</a>
                <el-input type="text" v-model="user.checkCode" placeholder="验证码"></el-input>
            </el-form-item>
            <el-form-item>
                <el-button type="primary" style="width:100%;" @click="login">登录</el-button>
            </el-form-item>
        </el-form>
    </div>
</template>

<script>
    export default {
        data(){
            var checkCodeValidate = (rule,value,callback)=>{
                var url = "user/checkCode";
                axios.post(url,`checkCode=${this.user.checkCode}`).then(resp=>{
                    if(!resp.data){
                        callback(new Error("验证输入错误!"));
                    }else{
                        callback();
                    }
                });
            };

            return{
                imgUrl:"http://localhost:8089/user/getCode",
                user:{},
                rules:{
                    username:[
                        {required:true,message:'请输入用户名',trigger:['blur','change']},
                        {min:2,max:10,message:'用户名长度必须在2-10个字符之间',trigger:['blur','change']}
                    ],
                    password:[
                        {required:true,message:'请输入密码',trigger:['blur','change']},
                        {min:2,max:10,message:'密码长度必须在2-10个字符之间',trigger:['blur','change']}
                    ],
                    checkCode:[
                        {required:true,message:'请输入验证码',trigger:['blur','change']},
                        {pattern:/^\w{4}$/,message:"验证码长度必须为4位"},
                        {validator:checkCodeValidate,trigger:'blur'}
                    ]
                }
            }
        },
        methods:{
            login(){
                this.$refs["loginForm"].validate(valid=>{
                    if(valid){
                        var url = "user/login";
                        axios.get(url,{params:this.user}).then((resp)=>{
                            if(resp.data){
                                this.$store.commit("setUsername",this.user.username);
                                this.$router.push("/main");
                            }else{
                                this.$alert("用户名或密码错误!");
                            }
                        });
                    }
                });
            },
            getcode(){
                this.imgUrl = this.imgUrl + "?"+Math.random();
            }
        }
    }
</script>

<style scoped="scoped">
    .login-container{
        width:350px;
        margin:100px auto 10px;
        border:1px solid #eaeaea;
        padding:35px 35px 15px 35px;
        border-radius: 15px;
        box-shadow:0 0 25px #cac6c6;
    }
    .login-title{
        text-align: center;
        color:#505458;
        margin:0px auto 40px;
    }
</style>
登录页后端
package com.neu.controller;

import java.awt.Graphics;
import java.awt.image.BufferedImage;
import java.io.ByteArrayOutputStream;
import java.io.IOException;

import javax.imageio.ImageIO;
import javax.servlet.http.HttpSession;

import org.springframework.http.HttpStatus;
import org.springframework.http.ResponseEntity;
import org.springframework.stereotype.Controller;
import org.springframework.web.bind.annotation.RequestMapping;
import org.springframework.web.bind.annotation.RestController;

@RestController
public class UserController {

    /*
     * @RequestMapping("/") public String getLogin() { return "user/login"; }
     */

    @RequestMapping("user/login")
    public boolean login(String username,String password,HttpSession session) {
        if("admin".equals(username) && "111".equals(password)) {
            session.setAttribute("username", username);
            return true;
        }else {
            return false;
        }
    }

    @RequestMapping("user/getCode")
    public ResponseEntity<byte[]> getCode(HttpSession session) throws IOException{
        char[] arr = {'0','1','2','3','4','5','6','7','8','9'};
        StringBuilder stb = new StringBuilder();
        int n;
        for(int i = 0;i < 4;i++) {
            n = (int)(Math.random()*arr.length);
            stb.append(arr[n]);
        }

        session.setAttribute("code", stb.toString());

        //把字符串放入到图片中,写入到输出流中
        BufferedImage buffImg = new BufferedImage(90, 20, BufferedImage.TYPE_INT_RGB);
        //得到画布
        Graphics g = buffImg.getGraphics();
        //向画布中写入字符串
        g.drawString(stb.toString(), 20, 15);

        ByteArrayOutputStream bos = new ByteArrayOutputStream();
        ImageIO.write(buffImg, "jpeg", bos);

        return new ResponseEntity<byte[]>(bos.toByteArray(),HttpStatus.CREATED);
    }

    @RequestMapping("user/checkCode")
    public boolean checkCode(String checkCode,HttpSession session) {
        String code = (String)session.getAttribute("code");

        if(code != null && code.equals(checkCode)) {
            return true;
        }else {
            return false;
        }

    }

}
Vue-Router 4
安装:
npm install vue-router


npm install vue-router@4
配置
history:createWebHistory():HTML5 history模式,是利用html5的history API实现的,需要服务器配合,服务器需要添加一个简单的回退路由。如果 URL 不匹配任何静态资源,它应提供与你的应用程序中的 index.html 相同的页面。不过这个工作一般交给运维去做地址格式:
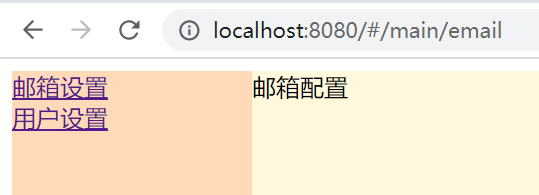
http://localhost:8080/listhistory: createWebHashHistory():hash模式完全前端就能实现地址格式:
http://localhost:8080/#/list
// /router/index.js

import {createRouter,createWebHistory} from 'vue-router'

export default createRouter({
    history:createWebHistory(),
    routes:[
        {
            path:'/',
            redirect:'/login'
        },
        {
            path:'/login',
            component:()=>import('../components/login')
        },
        {
            path:'/main',
            component:()=>import('../components/Main'),
            children:[
                {
                    path:'dept',
                    component:()=>import('../components/Dept')
                },
                {
                    path:'emp',
                    component:()=>import('../components/Emp')
                },
                {
                    path:'user',
                    component:()=>import('../components/User')
                }
            ]
        }
    ]
})
main.js
import VueRouter from './router/index'

const app = createApp(App);
//路由守卫
VueRouter.beforeEach((to,from,next)=>{
    console.log(to,from,next)
    let user = sessionStorage.getItem("user");
    if(to.path != "/login" && user == null){
        next("/login")
    }
    next()
})
主要内容
router-view将显示与 url 对应的组件。你可以把它放在任何地方,以适应你的布局。router-link没有使用常规的a标签,而是使用一个自定义组件router-link来创建链接。这使得 Vue Router 可以在不重新加载页面的情况下更改 URL,处理 URL 的生成以及编码。
login.vue
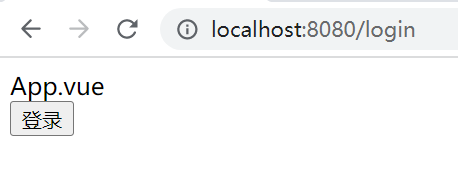
<template>
  <input type="button" value="登录" @click="login">
</template>

<script>
export default {
  name: "login",
  methods:{
    login(){
      sessionStorage.setItem("user",{})
      this.$router.push("/main")
    }
  }
}
</script>
main.vue
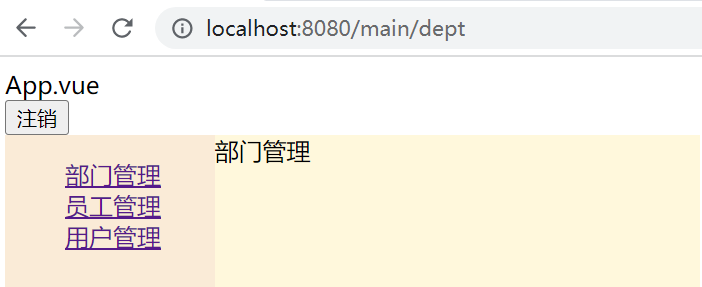
<template>
  <div id="top">
<!--    <router-link to="/login">注销</router-link>-->
    <input type="button" value="注销" @click="destroy">
  </div>
  <div id="parent">
    <div id="nav">
      <ul>
        <li><router-link to="/main/dept">部门管理</router-link></li>
        <li><router-link to="/main/emp">员工管理</router-link></li>
        <li><router-link to="/main/user">用户管理</router-link></li>
      </ul>
    </div>
    <div id="main">
      <router-view></router-view>
    </div>
  </div>
</template>

<script>
export default {
  name: "Main",
  created(){
    this.$router.replace("/main/dept");
  },
  methods:{
    destroy(){
      sessionStorage.removeItem("user")
      this.$router.replace("/login")
    }
  }
}
</script>

<style scoped>
#parent{
  display: flex;
}

#nav{
  width:200px;
  height: 500px;
  background-color: antiquewhite;
}

#main{
  width:100%;
  height: 500px;
  background-color: cornsilk;
}

li{
  list-style: none;
}
</style>
命名路由
除了 path 之外,你还可以为任何路由提供 name。这有以下优点:
- 没有硬编码的 URL
params的自动编码/解码。- 防止你在 url 中出现打字错误。
- 绕过路径排序(如显示一个)
const routes = [
  {
    path: '/user/:username',
    name: 'user',
    component: User
  }
]
要链接到一个命名的路由,可以向 router-link 组件的 to 属性传递一个对象:
<router-link :to="{ name: 'user', params: { username: 'erina' }">
  User
</router-link>
这跟代码调用 router.push() 是一回事:
router.push({ name: 'user', params: { username: 'erina' } })
在这两种情况下,路由将导航到路径 /user/erina
命名视图
App.vue
如果 router-view 没有设置名字,那么默认为 default。
<template>
  <div style="display: flex">
    <div style="width:200px;background-color: peachpuff;height: 500px;">
      aside
      <router-view name="aside"></router-view>
    </div>
    <div style="background-color:cornsilk;width: 100%;">
      main
      <router-view name="main"></router-view>
    </div>
  </div>
</template>

<script>
export default {
  name: 'App',
  components: {

  },
  methods:{

  }
}
</script>
路由
router/index.js
import {createRouter,createWebHashHistory} from "vue-router";

export default createRouter({
    history:createWebHashHistory(),
    routes:[
        {
            path:'/',
            // component:()=>import('../components/Main'),
           components:{
                   //default:()=>import('../components/Child3'),
                aside:()=>import('../components/Child5'),
                main:()=>import('../components/Child4')
           }

        }
    ]
})
嵌套命名视图
路由配置
index.js
import {createRouter,createWebHashHistory} from "vue-router";

export default createRouter({
    history:createWebHashHistory(),
    routes:[
        {
            path:'/',
            component:()=>import('../components/Login'),
        },
        {
            path:'/main',
            component:()=>import('../components/Main'),
            children:[
                {
                    path:'email',
                    component:()=>import('../components/EmailConfig')
                },
                {
                    path:'user',
                    components:{
                        default:()=>import('../components/UserConfig'),
                        helper:()=>import('../components/UserHelper')
                    }
                }
            ]
        }
    ]
})
App.vue
<template>
  <router-view></router-view>
</template>
Login.vue
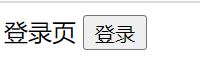
<template>
  登录页
  <button @click="login">登录</button>
</template>

<script>
export default {
  name: "Login",
  methods:{
    login(){
      this.$router.push({path:'/main/email'});
    }
  }
}
</script>
Main.vue
<template>
  <div style="display: flex">
    <div style="width:200px;background-color: peachpuff;height: 500px;">
      <NavMenu></NavMenu>
    </div>
    <div style="background-color:cornsilk;width: 100%;">

      <div>
        <router-view></router-view>
      </div>
      <div>
        <router-view name="helper"></router-view>
      </div>
    </div>
  </div>
</template>

<script>
import NavMenu from './NavMenu'
export default {
  name: "Main",
  components:{
    NavMenu
  }
}
</script>
NavMenu.vue
<template>
  <router-link to="/main/email">邮箱设置</router-link>
  <br>
  <router-link to="/main/user">用户设置</router-link>
</template>
EmailConfig.vue
<template>
  邮箱配置
</template>
UserConfig.vue
<template>
  用户配置
</template>
UserHelper.vue
<template>
  用户帮助
</template>
分页
服务器端
pom.xml
<dependency>
    <groupId>com.github.pagehelper</groupId>
    <artifactId>pagehelper-spring-boot-starter</artifactId>
    <version>1.4.1</version>
</dependency>
service
@Override
public PageInfo<Dept> paged(int pageNum, int pageSize) {
    PageHelper.startPage(pageNum,pageSize);

    List<Dept> list = deptMapper.getAll();

    PageInfo pageInfo = new PageInfo(list);

    return pageInfo;
}
controller
@RequestMapping("paged")
@ResponseBody
public PageInfo<Dept> paged(@RequestParam(defaultValue = "1") int 	pageNum,@RequestParam(defaultValue = "3") int pageSize){
    return deptService.paged(pageNum,pageSize);
}
前端
<template>
  部门管理
  <table border="1" width="500">
    <tr v-for="dept in pageInfo.list" :key="dept.deptno">
      <td>{dept.deptno}</td>
      <td>{dept.dname}</td>
      <td>{dept.loc}</td>
    </tr>
    <tr>
      <td colspan="3">
        <a href="#" v-for="num in pageInfo.navigatepageNums" :key="num" @click="paged(num,pageInfo.pageSize)">[{num}]</a>

       <a href="#" @click="paged(pageInfo.navigateFirstPage,pageInfo.pageSize)" v-show="pageInfo.hasPreviousPage">第一页</a>
        <a href="#" @click="paged(pageInfo.prePage,pageInfo.pageSize)" v-show="pageInfo.hasPreviousPage">上一页</a>
        <a href="#" @click="paged(pageInfo.nextPage,pageInfo.pageSize)" v-show="pageInfo.hasNextPage">下一页</a>
        <a href="#" @click="paged(pageInfo.navigateLastPage,pageInfo.pageSize)" v-show="pageInfo.hasNextPage">最后一页</a>
        <select v-model="pageInfo.pageSize" @change="changePageSize">
          <option>3</option>
          <option>5</option>
          <option>10</option>
        </select>
      </td>
    </tr>
  </table>
</template>

<script>
export default {
  name: "Dept",
  data(){
    return {
      pageInfo:{
        pageNum:1,pageSize:3
      }
    }
  },
  methods:{
    paged(pageNum,pageSize){
      this.$http.post('dept/paged',`pageNum=${pageNum}&pageSize=${pageSize}`)
        .then((resp)=>{
          this.pageInfo = resp.data;
        })
    },
    changePageSize(){
      this.paged(1,this.pageInfo.pageSize)
    }
  },
  created() {
    this.paged(1,3)
  }
}
</script>

<style scoped>

</style>
ElementUI-plus
安装
npm install element-plus --save
使用
// main.js
import { createApp } from 'vue'
import ElementPlus from 'element-plus'
import 'element-plus/dist/index.css'
import App from './App.vue'

const app = createApp(App)

app.use(ElementPlus)
app.mount('#app')
Container 布局容器
用于布局的容器组件,方便快速搭建页面的基本结构:
<el-container>:外层容器。 当子元素中包含 <el-header> 或 <el-footer> 时,全部子元素会垂直上下排列, 否则会水平左右排列。
<el-header>:顶栏容器。
<el-aside>:侧边栏容器。
<el-main>:主要区域容器。
<el-footer>:底栏容器。
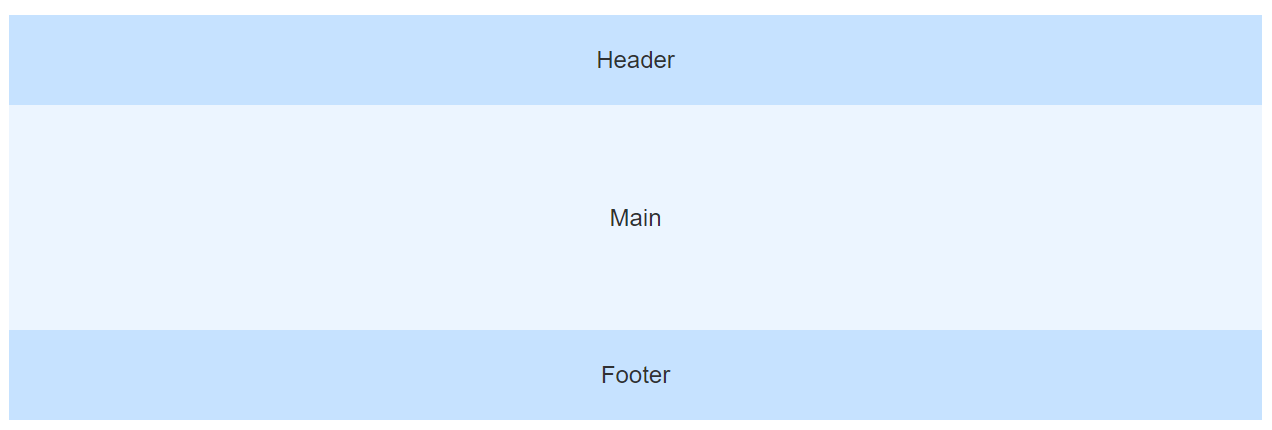
<template>
  <div class="common-layout">
    <el-container>
      <el-header>Header</el-header>
      <el-main>Main</el-main>
      <el-footer>Footer</el-footer>
    </el-container>
  </div>
</template>

<style scoped>

.common-layout .el-header,
.common-layout .el-footer,
.common-layout .el-main,
.common-layout .el-aside {
  display: flex;
  justify-content: center;
  align-items: center;
}

.common-layout .el-header,
.common-layout .el-footer {
  background-color: #c6e2ff;
  color: var(--el-text-color-primary);
  text-align: center;
}

.common-layout .el-main {
  background-color: var(--el-color-primary-light-9);
  color: var(--el-text-color-primary);
  text-align: center;
  height: 150px;
}
</style>
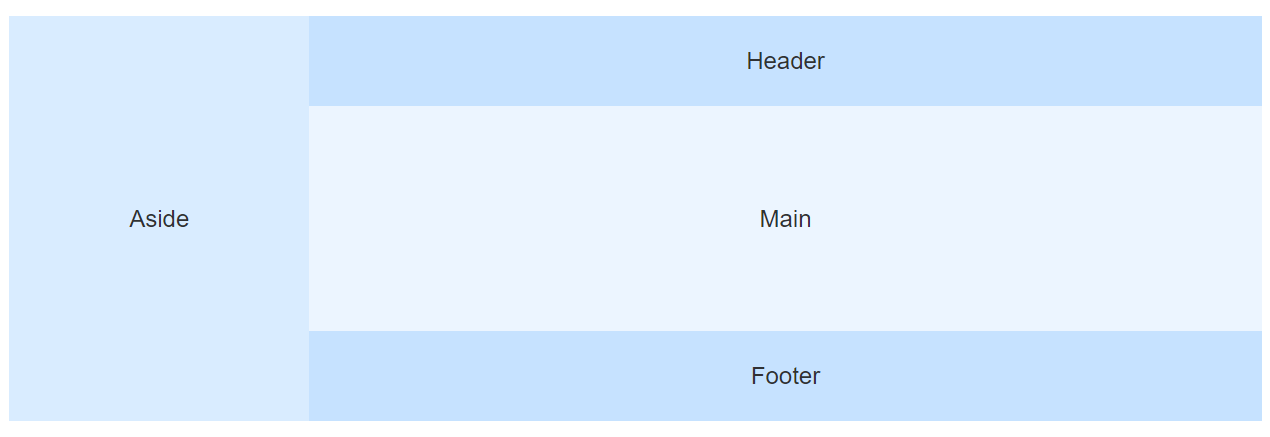
<template>
  <div class="common-layout">
    <el-container>
      <el-aside width="200px">Aside</el-aside>
      <el-container>
        <el-header>Header</el-header>
        <el-main>Main</el-main>
        <el-footer>Footer</el-footer>
      </el-container>
    </el-container>
  </div>
</template>

<style scoped>

.common-layout .el-header,
.common-layout .el-footer,
.common-layout .el-main,
.common-layout .el-aside {
  display: flex;
  justify-content: center;
  align-items: center;
}

.common-layout .el-header,
.common-layout .el-footer {
  background-color: #c6e2ff;
  color: var(--el-text-color-primary);
  text-align: center;
}

.common-layout .el-main {
  background-color: var(--el-color-primary-light-9);
  color: var(--el-text-color-primary);
  text-align: center;
  height: 150px;
}

.common-layout .el-aside {
  background-color: var(--el-color-primary-light-8);
  color: var(--el-text-color-primary);
  text-align: center;
}
</style>
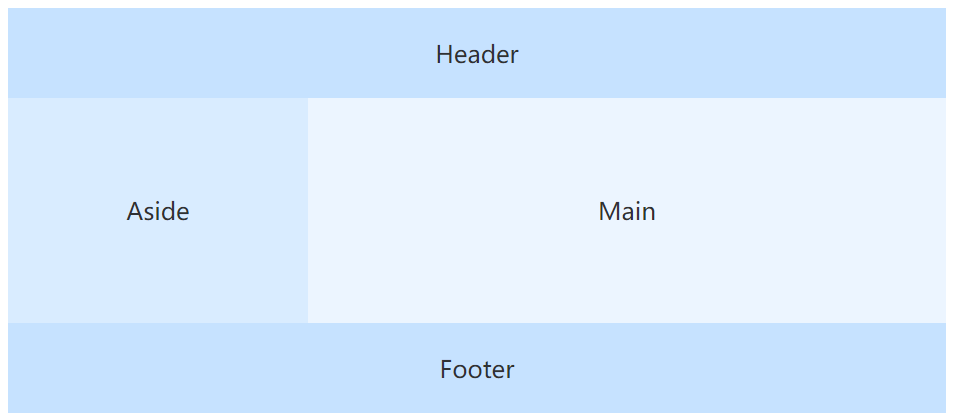
<template>
  <div class="common-layout">
    <el-container>
      <el-header>Header</el-header>
      <el-container>
        <el-aside width="200px">Aside</el-aside>
        <el-main>Main</el-main>
      </el-container>
      <el-footer>Footer</el-footer>
    </el-container>
  </div>
</template>

<style scoped>

.common-layout .el-header,
.common-layout .el-footer,
.common-layout .el-main,
.common-layout .el-aside {
  display: flex;
  justify-content: center;
  align-items: center;
}

.common-layout .el-header,
.common-layout .el-footer {
  background-color: #c6e2ff;
  color: var(--el-text-color-primary);
  text-align: center;
}

.common-layout .el-main {
  background-color: var(--el-color-primary-light-9);
  color: var(--el-text-color-primary);
  text-align: center;
  height: 150px;
}

.common-layout .el-aside {
  /*var()函数中的值可以在浏览器调试中查看*/
  background-color: var(--el-color-primary-light-8);
  color: var(--el-text-color-primary);
  text-align: center;
}
</style>
Container 属性
| 属性 | 说明 | 类型 | 可选值 | 默认值 |
|---|---|---|---|---|
| direction | 子元素的排列方向 | string | horizontal / vertical | 子元素中有 el-header 或 el-footer 时为 vertical,否则为 horizontal |
Container 插槽
| 插槽名 | 说明 | 子标签 |
|---|---|---|
| — | 自定义默认内容 | Container / Header / Aside / Main / Footer |
Header 属性
| 属性 | 说明 | 类型 | 可选值 | 默认值 |
|---|---|---|---|---|
| height | 顶栏高度 | string | — | 60px |
Header 插槽
| 插槽名 | 说明 |
|---|---|
| — | 自定义默认内容 |
Aside 属性
| 属性 | 说明 | 类型 | 可选值 | 默认值 |
|---|---|---|---|---|
| width | 侧边栏宽度 | string | — | 300px |
Aside 插槽
| 插槽名 | 说明 |
|---|---|
| — | 自定义默认内容 |
Main 插槽
| 插槽名 | 说明 |
|---|---|
| — | 自定义默认内容 |
Footer 属性
| 属性 | 说明 | 类型 | 可选值 | 默认值 |
|---|---|---|---|---|
| height | 底栏高度 | string | — | 60px |
Footer 插槽
| 插槽名 | 说明 |
|---|---|
| — | 自定义默认内容 |
CSS var() 函数
实例
定义一个名为 “–main-bg-color” 的属性,然后使用 var() 函数调用该属性:
:root {
  --main-bg-color: coral;
}

#div1 {
  background-color: var(--main-bg-color);
}

#div2 {
  background-color: var(--main-bg-color);
}
布局
通过基础的 24 分栏,迅速简便地创建布局。
基础布局
使用列创建基础网格布局。
通过 row 和 col 组件,并通过 col 组件的 span 属性我们就可以自由地组合布局。
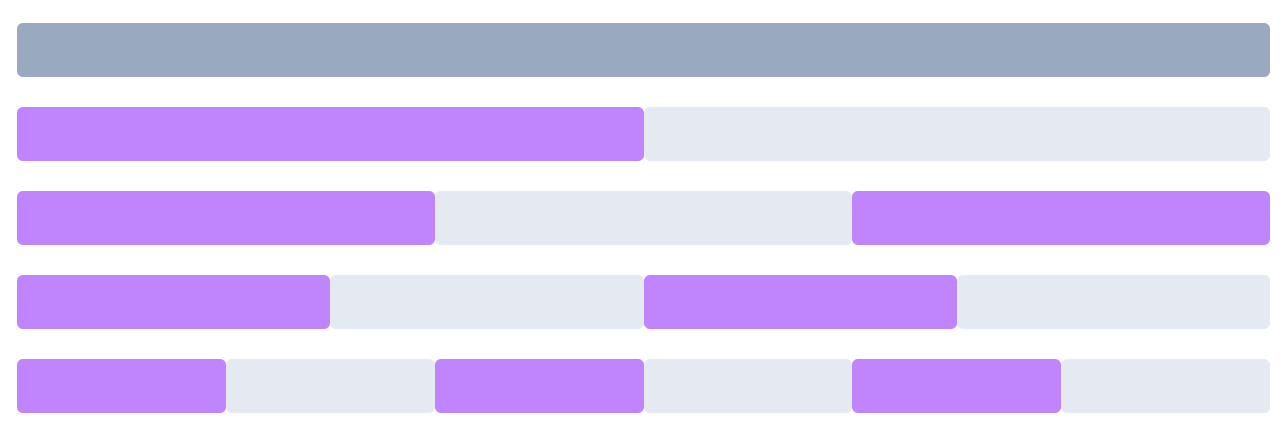
<template>
  <el-row>
    <el-col :span="24"><div class="grid-content bg-purple-dark" /></el-col>
  </el-row>
  <el-row>
    <el-col :span="12"><div class="grid-content bg-purple" /></el-col>
    <el-col :span="12"><div class="grid-content bg-purple-light" /></el-col>
  </el-row>
  <el-row>
    <el-col :span="8"><div class="grid-content bg-purple" /></el-col>
    <el-col :span="8"><div class="grid-content bg-purple-light" /></el-col>
    <el-col :span="8"><div class="grid-content bg-purple" /></el-col>
  </el-row>
  <el-row>
    <el-col :span="6"><div class="grid-content bg-purple" /></el-col>
    <el-col :span="6"><div class="grid-content bg-purple-light" /></el-col>
    <el-col :span="6"><div class="grid-content bg-purple" /></el-col>
    <el-col :span="6"><div class="grid-content bg-purple-light" /></el-col>
  </el-row>
  <el-row>
    <el-col :span="4"><div class="grid-content bg-purple" /></el-col>
    <el-col :span="4"><div class="grid-content bg-purple-light" /></el-col>
    <el-col :span="4"><div class="grid-content bg-purple" /></el-col>
    <el-col :span="4"><div class="grid-content bg-purple-light" /></el-col>
    <el-col :span="4"><div class="grid-content bg-purple" /></el-col>
    <el-col :span="4"><div class="grid-content bg-purple-light" /></el-col>
  </el-row>
</template>

<style lang="scss">
.el-row {
  margin-bottom: 20px;
}
.el-row:last-child {
  margin-bottom: 0;
}
.el-col {
  border-radius: 4px;
}

.grid-content {
  border-radius: 4px;
  min-height: 36px;
}

.bg-purple-dark {
    background: #99a9bf;
}

.bg-purple {
    background: rgba(192,132,252);
}

.bg-purple-light {
    background: #e5e9f2;
}
</style>
分栏间隔
支持列间距。

行提供 gutter 属性来指定列之间的间距,其默认值为0。
<template>
  <el-row :gutter="20">
    <el-col :span="6"><div class="grid-content bg-purple" /></el-col>
    <el-col :span="6"><div class="grid-content bg-purple" /></el-col>
    <el-col :span="6"><div class="grid-content bg-purple" /></el-col>
    <el-col :span="6"><div class="grid-content bg-purple" /></el-col>
  </el-row>
</template>

<style>
.el-row {
  margin-bottom: 20px;
}
.el-row:last-child {
  margin-bottom: 0;
}
.el-col {
  border-radius: 4px;
}

.grid-content {
  border-radius: 4px;
  min-height: 36px;
}
.bg-purple-dark {
  background: #99a9bf;
}

.bg-purple {
  background: rgba(192,132,252);
}

.bg-purple-light {
  background: #e5e9f2;
}
</style>
混合布局
通过基础的 1/24 分栏任意扩展组合形成较为复杂的混合布局。

<template>
  <el-row :gutter="20">
    <el-col :span="16"><div class="grid-content bg-purple" /></el-col>
    <el-col :span="8"><div class="grid-content bg-purple" /></el-col>
  </el-row>
  <el-row :gutter="20">
    <el-col :span="8"><div class="grid-content bg-purple" /></el-col>
    <el-col :span="8"><div class="grid-content bg-purple" /></el-col>
    <el-col :span="4"><div class="grid-content bg-purple" /></el-col>
    <el-col :span="4"><div class="grid-content bg-purple" /></el-col>
  </el-row>
  <el-row :gutter="20">
    <el-col :span="4"><div class="grid-content bg-purple" /></el-col>
    <el-col :span="16"><div class="grid-content bg-purple" /></el-col>
    <el-col :span="4"><div class="grid-content bg-purple" /></el-col>
  </el-row>
</template>

<style>
.el-row {
  margin-bottom: 20px;
}
.el-row:last-child {
  margin-bottom: 0;
}
.el-col {
  border-radius: 4px;
}

.grid-content {
  border-radius: 4px;
  min-height: 36px;
}
.bg-purple {
  background: rgba(192,132,252);
}
</style>
列偏移
您可以指定列偏移量。
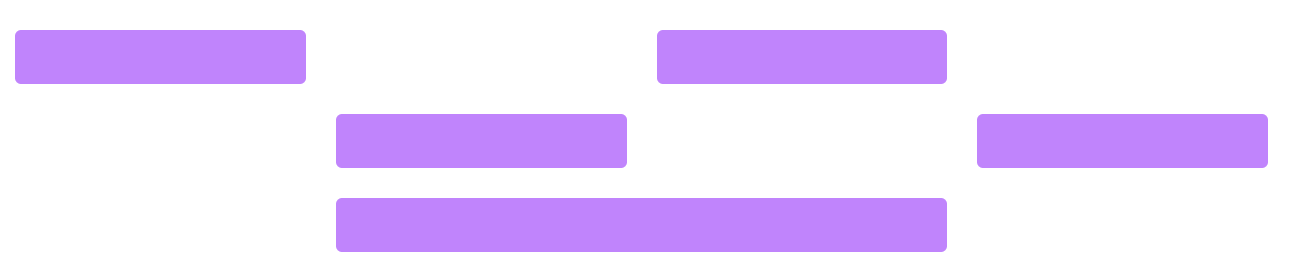
通过制定 col 组件的 offset 属性可以指定分栏偏移的栏数。
<template>
  <el-row :gutter="20">
    <el-col :span="6"><div class="grid-content bg-purple" /></el-col>
    <el-col :span="6" :offset="6"
      ><div class="grid-content bg-purple"
    /></el-col>
  </el-row>
  <el-row :gutter="20">
    <el-col :span="6" :offset="6"
      ><div class="grid-content bg-purple"
    /></el-col>
    <el-col :span="6" :offset="6"
      ><div class="grid-content bg-purple"
    /></el-col>
  </el-row>
  <el-row :gutter="20">
    <el-col :span="12" :offset="6"
      ><div class="grid-content bg-purple"
    /></el-col>
  </el-row>
</template>

<style>
.el-row {
  margin-bottom: 20px;
}
.el-row:last-child {
  margin-bottom: 0;
}
.el-col {
  border-radius: 4px;
}

.grid-content {
  border-radius: 4px;
  min-height: 36px;
}
.bg-purple {
  background: rgba(192,132,252);
}
</style>
对齐方式
默认使用 flex 布局来对分栏进行灵活的对齐。
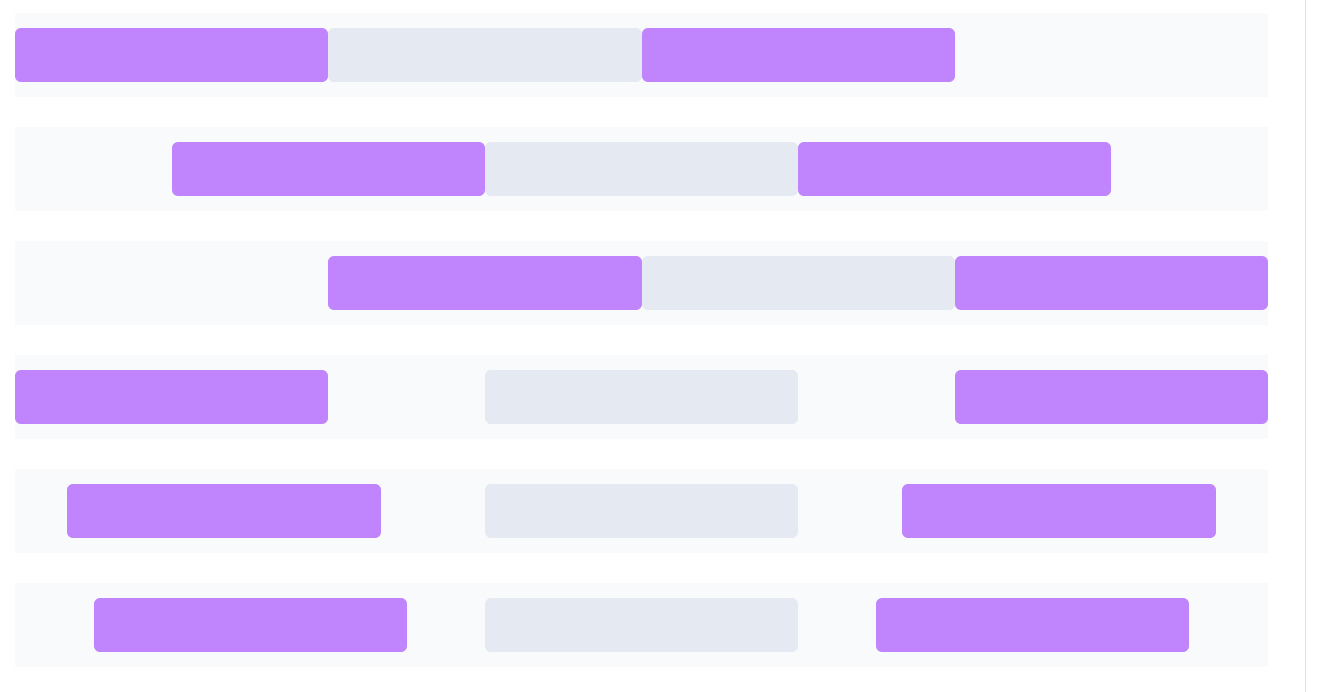
您可以通过justify 属性来定义子元素的排版方式,其取值为start、center、end、space-between、space-around或space-evenly。
<template>
  <el-row class="row-bg">
    <el-col :span="6"><div class="grid-content bg-purple" /></el-col>
    <el-col :span="6"><div class="grid-content bg-purple-light" /></el-col>
    <el-col :span="6"><div class="grid-content bg-purple" /></el-col>
  </el-row>
  <el-row class="row-bg" justify="center">
    <el-col :span="6"><div class="grid-content bg-purple" /></el-col>
    <el-col :span="6"><div class="grid-content bg-purple-light" /></el-col>
    <el-col :span="6"><div class="grid-content bg-purple" /></el-col>
  </el-row>
  <el-row class="row-bg" justify="end">
    <el-col :span="6"><div class="grid-content bg-purple" /></el-col>
    <el-col :span="6"><div class="grid-content bg-purple-light" /></el-col>
    <el-col :span="6"><div class="grid-content bg-purple" /></el-col>
  </el-row>
  <el-row class="row-bg" justify="space-between">
    <el-col :span="6"><div class="grid-content bg-purple" /></el-col>
    <el-col :span="6"><div class="grid-content bg-purple-light" /></el-col>
    <el-col :span="6"><div class="grid-content bg-purple" /></el-col>
  </el-row>
  <el-row class="row-bg" justify="space-around">
    <el-col :span="6"><div class="grid-content bg-purple" /></el-col>
    <el-col :span="6"><div class="grid-content bg-purple-light" /></el-col>
    <el-col :span="6"><div class="grid-content bg-purple" /></el-col>
  </el-row>
  <el-row class="row-bg" justify="space-evenly">
    <el-col :span="6"><div class="grid-content bg-purple" /></el-col>
    <el-col :span="6"><div class="grid-content bg-purple-light" /></el-col>
    <el-col :span="6"><div class="grid-content bg-purple" /></el-col>
  </el-row>
</template>

<style>
.el-row {
  margin-bottom: 20px;
}
.el-row:last-child {
  margin-bottom: 0;
}
.el-col {
  border-radius: 4px;
}

.grid-content {
  border-radius: 4px;
  min-height: 36px;
}

.bg-purple {
  background: rgba(192,132,252);
}

.bg-purple-light {
  background: #e5e9f2;
}
</style>
Row 属性
| 属性 | 说明 | 类型 | 可选值 | 默认值 |
|---|---|---|---|---|
| gutter | 栅格间隔 | number | — | 0 |
| justify | flex 布局下的水平排列方式 | string | start/end/center/space-around/space-between/space-evenly | start |
| align | flex 布局下的垂直排列方式 | string | top/middle/bottom | top |
| tag | 自定义元素标签 | string | * | div |
Col 属性
| 属性 | 说明 | 类型 | 可选值 | 默认值 |
|---|---|---|---|---|
| span | 栅格占据的列数 | number | — | 24 |
| offset | 栅格左侧的间隔格数 | number | — | 0 |
| push | 栅格向右移动格数 | number | — | 0 |
| pull | 栅格向左移动格数 | number | — | 0 |
| xs | <768px 响应式栅格数或者栅格属性对象 |
number/object (例如 {span: 4, offset: 4}) | — | — |
| sm | ≥768px 响应式栅格数或者栅格属性对象 |
number/object (例如 {span: 4, offset: 4}) | — | — |
| md | ≥992px 响应式栅格数或者栅格属性对象 |
number/object (例如 {span: 4, offset: 4}) | — | — |
| lg | ≥1200px 响应式栅格数或者栅格属性对象 |
number/object (例如 {span: 4, offset: 4}) | — | — |
| xl | ≥1920px 响应式栅格数或者栅格属性对象 |
number/object (例如 {span: 4, offset: 4}) | — | — |
| tag | 自定义元素标签 | string | * | div |
登录页

<template>
  <div>
    <el-form class="login-container">
      <h3 class="login-title">系统登录</h3>
      <el-form-item prop="username">
        <el-input type="text" v-model="user.username" placeholder="账号"></el-input>
      </el-form-item>
      <el-form-item prop="password">
        <el-input type="password" v-model="user.password" placeholder="密码"></el-input>
      </el-form-item>
      <el-form-item prop="checkCode">
        <img><a href="#" >看不清</a>
        <el-input type="text" v-model="user.checkCode" placeholder="验证码"></el-input>
      </el-form-item>
      <el-form-item>
        <el-button type="primary" style="width:100%;" >登录</el-button>
      </el-form-item>
    </el-form>
  </div>
</template>

<script>
export default {
  name: "Login",
  data(){
    return{
      user:{}
    }
  }
}
</script>

<style scoped="scoped">
.login-container{
  width:350px;
  margin:100px auto 10px;
  border:1px solid #eaeaea;
  padding:35px 35px 15px 35px;
  border-radius: 15px;
  box-shadow:0 0 25px #cac6c6;
}
.login-title{
  text-align: center;
  color:#505458;
  margin:0px auto 40px;
}
</style>
图标
安装
npm install @element-plus/icons-vue
全局注册
import * as ElementPlusIconsVue from '@element-plus/icons-vue'

const app = createApp(App)
for (const [key, component] of Object.entries(ElementPlusIconsVue)) {
  app.component(key, component)
}
使用
<template>
  <p>
    with extra class <b>is-loading</b>, your icon is able to rotate 360 deg in 2
    seconds, you can also override this
  </p>
  <el-icon :size="20">
    <Edit />
  </el-icon>
  <el-icon color="#409EFC" class="no-inherit">
    <Share />
  </el-icon>
  <el-icon>
    <Delete />
  </el-icon>
  <el-icon class="is-loading">
    <Loading />
  </el-icon>
  <el-button type="primary">
    <el-icon style="vertical-align: middle">
      <Search />
    </el-icon>
    <span style="vertical-align: middle"> Search </span>
  </el-button>
</template>
综合应用
登录页
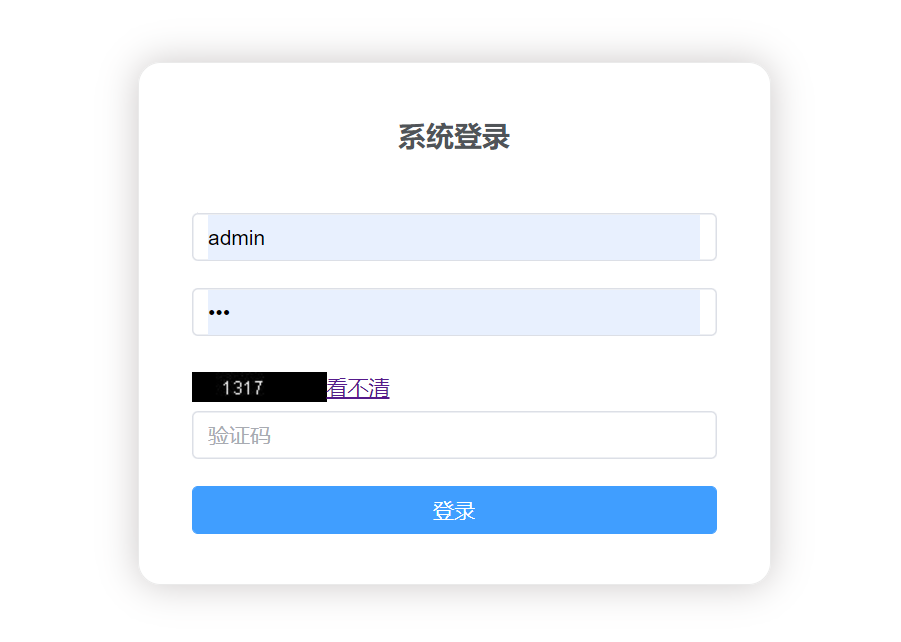
功能
elementui的表单和表单元素
<template>
    <div>
        <el-form class="login-container">
            <h3 class="login-title">系统登录</h3>
            <el-form-item >
                <el-input type="text" v-model="user.username" placeholder="账号"></el-input>
            </el-form-item>
            <el-form-item >
                <el-input type="password" v-model="user.password" placeholder="密码"></el-input>
            </el-form-item>
            <el-form-item >
                <el-input type="text" v-model="user.checkCode" placeholder="验证码"></el-input>
            </el-form-item>
            <el-form-item>
                <el-button type="primary" style="width:100%;" >登录</el-button>
            </el-form-item>
        </el-form>
    </div>
</template>

<style scoped="scoped">
    .login-container{
        width:350px;
        margin:100px auto 10px;
        border:1px solid #eaeaea;
        padding:35px 35px 15px 35px;
        border-radius: 15px;
        box-shadow:0 0 25px #cac6c6;
    }
    .login-title{
        text-align: center;
        color:#505458;
        margin:0px auto 40px;
    }
</style>
验证码
前端
<el-form-item >
    <img :src="imgUrl"><a href="#" @click="getCode">看不清</a>
    <el-input type="text" v-model="user.checkCode" placeholder="验证码"></el-input>
</el-form-item>
return{
 imgUrl:"http://localhost:8089/user/getCode"
}
getCode(){
    this.imgUrl = this.imgUrl + "?"+Math.random();
}
后端
@RequestMapping("user/getCode")
    public ResponseEntity<byte[]> getCode(HttpSession session) throws IOException{
        char[] arr = {'0','1','2','3','4','5','6','7','8','9'};
        StringBuilder stb = new StringBuilder();
        int n;
        for(int i = 0;i < 4;i++) {
            n = (int)(Math.random()*arr.length);
            stb.append(arr[n]);
        }

        session.setAttribute("code", stb.toString());

        //把字符串放入到图片中,写入到输出流中
        BufferedImage buffImg = new BufferedImage(90, 20, BufferedImage.TYPE_INT_RGB);
        //得到画布
        Graphics g = buffImg.getGraphics();
        //向画布中写入字符串
        g.drawString(stb.toString(), 20, 15);

        ByteArrayOutputStream bos = new ByteArrayOutputStream();
        ImageIO.write(buffImg, "jpeg", bos);

        return new ResponseEntity<byte[]>(bos.toByteArray(),HttpStatus.CREATED);
    }
表单验证
在表单和表单元素上添加属性
<template>
    <div >
        <el-form class="login-container" :model="user" :rules="rules" ref="loginForm">
            <h3 class="login-title">系统登录</h3>
            <el-form-item prop="username">
                <el-input type="text" v-model="user.username" placeholder="账号"></el-input>
            </el-form-item>
            <el-form-item prop="password">
                <el-input type="password" v-model="user.password" placeholder="密码"></el-input>
            </el-form-item>
            <el-form-item prop="checkCode">
                <img :src="imgUrl"><a href="#" @click="getCode">看不清</a>
                <el-input type="text" v-model="user.checkCode" placeholder="验证码"></el-input>
            </el-form-item>
            <el-form-item>
                <el-button type="primary" style="width:100%;" @click="login">登录</el-button>
            </el-form-item>
        </el-form>
    </div>
</template>
添加验证规则
<script>
    export default {
        data(){
            let checkCodeValidate = (rule,value,callback)=>{
                let url = "user/checkCode";
                this.$http.post(url,`checkCode=${this.user.checkCode}`).then(resp=>{
                    if(!resp.data){
                        callback(new Error("验证码输入错误!"));
                    }else{
                        callback();
                    }
                });
            };

            return{
                user:{},
                rules:{
                    username:[
                        {required:true,message:'请输入用户名',trigger:['blur','change']},
                        {min:2,max:10,message:'用户名长度必须在2-10个字符之间',trigger:['blur','change']}
                    ],
                    password:[
                        {required:true,message:'请输入密码',trigger:['blur','change']},
                        {min:2,max:10,message:'密码长度必须在2-10个字符之间',trigger:['blur','change']}
                    ],
                    checkCode:[
                        {required:true,message:'请输入验证码',trigger:['blur','change']},
                        {pattern:/^\w{4}$/,message:"验证码长度必须为4位"},
                        {validator:checkCodeValidate,trigger:'blur'}
                    ]
                }
            }
        },
        methods:{
            login(){
                this.$refs["loginForm"].validate(valid=>{
                    if(valid){
                        //登录
                    }
                });
            }
        }
    }
</script>
后端验证
@RequestMapping("user/checkCode")
    public boolean checkCode(String checkCode,HttpSession session) {
        String code = (String)session.getAttribute("code");

        if(code != null && code.equals(checkCode)) {
            return true;
        }else {
            return false;
        }

    }
axios
登录
login(){
                this.$refs["loginForm"].validate(valid=>{
                    if(valid){
                        let url = "user/login";
                        this.$http.get(url,{params:this.user}).then((resp)=>{
                            if(resp.data){
                this.$store.commit("setUsername",this.user.username);
                                this.$router.push("/main");
                            }else{
                                this.$alert("用户名或密码错误!");
                            }
                        });
                    }
                });
            }
验证验证码
let checkCodeValidate = (rule,value,callback)=>{
                let url = "user/checkCode";
                this.$http.post(url,`checkCode=${this.user.checkCode}`).then(resp=>{
                    if(!resp.data){
                        callback(new Error("验证码输入错误!"));
                    }else{
                        callback();
                    }
                });
            };
vuex
登录成功后,修改state
this.$store.commit("setUsername",this.user.username);
import {createStore} from 'vuex'

export default createStore({
    state: {
        username: ''
    },
    mutations: {
        setUsername(state, payload) {
            state.username = payload;
        }
    },
    getters: {
        formatUsername(state) {
            return `用户名:${state.username}`;
        }
    }
})
路由
登录成功后,跳转到主页
this.$router.push("/main");
import Login from './views/Login'
import {createRouter, createWebHistory} from 'vue-router'

export default createRouter({
    history: createWebHistory(),
    routes: [
        {
            path: '/',
            name: 'login',
            component: Login
        },
        {
            path: '/main',
            name: 'main',
            // route level code-splitting
            // this generates a separate chunk (about.[hash].js) for this route
            // which is lazy-loaded when the route is visited.
            component: () => import('./views/Main.vue'),
         }
    ]
})
键盘事件处理
回车提交表单
<template>
    <div @keydown.enter="login">
        //...
    </div>
</template>
elementui的警告对话框alert
this.$alert("用户名或密码错误!");
完整登录页
<template>
    <div @keydown.enter="login">
        <el-form class="login-container" :model="user" :rules="rules" ref="loginForm">
            <h3 class="login-title">系统登录</h3>
            <el-form-item prop="username">
                <el-input type="text" v-model="user.username" placeholder="账号"></el-input>
            </el-form-item>
            <el-form-item prop="password">
                <el-input type="password" v-model="user.password" placeholder="密码"></el-input>
            </el-form-item>
            <el-form-item prop="checkCode">
                <img :src="imgUrl"><a href="#" @click="getCode">看不清</a>
                <el-input type="text" v-model="user.checkCode" placeholder="验证码"></el-input>
            </el-form-item>
            <el-form-item>
                <el-button type="primary" style="width:100%;" @click="login">登录</el-button>
            </el-form-item>
        </el-form>
    </div>
</template>

<script>
    export default {
        data(){
            let checkCodeValidate = (rule,value,callback)=>{
                let url = "user/checkCode";
                this.$http.post(url,`checkCode=${this.user.checkCode}`).then(resp=>{
                    if(!resp.data){
                        callback(new Error("验证码输入错误!"));
                    }else{
                        callback();
                    }
                });
            };

            return{
                imgUrl:"http://localhost:8089/user/getCode",
                user:{},
                rules:{
                    username:[
                        {required:true,message:'请输入用户名',trigger:['blur','change']},
                        {min:2,max:10,message:'用户名长度必须在2-10个字符之间',trigger:['blur','change']}
                    ],
                    password:[
                        {required:true,message:'请输入密码',trigger:['blur','change']},
                        {min:2,max:10,message:'密码长度必须在2-10个字符之间',trigger:['blur','change']}
                    ],
                    checkCode:[
                        {required:true,message:'请输入验证码',trigger:['blur','change']},
                        {pattern:/^\w{4}$/,message:"验证码长度必须为4位"},
                        {validator:checkCodeValidate,trigger:'blur'}
                    ]
                }
            }
        },
        methods:{
            login(){
                this.$refs["loginForm"].validate(valid=>{
                    if(valid){
                        let url = "user/login";
                        this.$http.get(url,{params:this.user}).then((resp)=>{
                            if(resp.data){
                this.$store.commit("setUsername",this.user.username);
                                this.$router.push("/main");
                            }else{
                                this.$alert("用户名或密码错误!");
                            }
                        });
                    }
                });
            },
            getCode(){
                this.imgUrl = this.imgUrl + "?"+Math.random();
            }
        }
    }
</script>

<style scoped="scoped">
    .login-container{
        width:350px;
        margin:100px auto 10px;
        border:1px solid #eaeaea;
        padding:35px 35px 15px 35px;
        border-radius: 15px;
        box-shadow:0 0 25px #cac6c6;
    }
    .login-title{
        text-align: center;
        color:#505458;
        margin:0px auto 40px;
    }
</style>
主页
布局
<template>
  <div>
    <el-container>
      <el-header>
        <el-row>
          <el-col :span="6">
            <span class="main_title">东软人力资源管理系统</span>
          </el-col>
          <el-col :span="2" :offset="16" class="user_title">
            ADMIN
          </el-col>
        </el-row>
      </el-header>
      <el-container class="main">
        <el-aside width="200px">
        </el-aside>

        <el-main>
          <router-view></router-view>
        </el-main>

      </el-container>
      <el-footer>Footer</el-footer>
    </el-container>
  </div>
</template>

<style scoped>
.el-header,
.el-footer {
  height: 60px;
  background-color: #409EFF;
}

a {
  text-decoration: none;
}

.main_title {
  font-size: 22px;
  color: #fff;
  height: 60px;
  line-height: 60px;
}

.main{
  min-height: 480px;
}

.user_title {
  height: 60px;
  display: flex;
  align-items: center;
  justify-content: center;
}
</style>
Vuex
显示用户名
<span>
    { $store.state.username.toUpperCase() }(两个大括号)
</span>
导航
<el-aside width="200px" v-show="isShowMenu" >
          <el-menu>
            <el-sub-menu index="1">
              <template #title>
                <span>部门管理</span>
              </template>
              <el-menu-item index="1-1">
                <router-link to="/dept">部门管理</router-link>
              </el-menu-item>
              <el-menu-item index="1-2">
                <span><router-link to="/report">报表</router-link></span>
              </el-menu-item>
            </el-sub-menu>
            <el-menu-item index="2">
              <span><router-link to="/emp">员工管理</router-link></span>
            </el-menu-item>
          </el-menu>
</el-aside>
图标
<el-icon><location /></el-icon>
<span>部门管理</span>

<el-icon><document /></el-icon>
<span><router-link to="/emp">员工管理</router-link></span>
下拉菜单
<el-col :span="2" :offset="16" class="user_title">
            <el-dropdown class="el-dropdown-link" @command="handleCommand">
                        <span>
              { $store.state.username.toUpperCase() }
                            <i class="el-icon-arrow-down el-icon--right"></i>
                        </span>
              <template #dropdown>
                <el-dropdown-menu>
                  <el-dropdown-item command="hideMenu">{ hideMenuText }</el-dropdown-item>
                  <el-dropdown-item command="exit">退出登录</el-dropdown-item>
                </el-dropdown-menu>
              </template>
            </el-dropdown>
</el-col>
<script>
export default {
  data() {
    return {
      hideMenuText: '隐藏菜单',
      isShowMenu: true
    }
  },
  methods: {
    handleCommand(command) {
      if (command == "hideMenu") {
        if (this.hideMenuText == "隐藏菜单") {
          this.hideMenuText = "显示菜单";
          this.isShowMenu = false;
        } else {
          this.hideMenuText = "隐藏菜单";
          this.isShowMenu = true;
        }
      } else if (command == "exit") {
        this.$confirm("真的要退出系统吗?", "提示").then(() => {
          this.$router.push({name: 'login'});
          this.$store.commit("setUsername", "");
        }).catch(() => {
        });
      }
    }
  }
}
</script>
完整主页
<template>
  <div>
    <el-container>
      <el-header>
        <el-row>
          <el-col :span="6">
            <span class="main_title">东软人力资源管理系统</span>
          </el-col>
          <el-col :span="2" :offset="16" class="user_title">

            <el-dropdown class="el-dropdown-link" @command="handleCommand">
                        <span>
              { $store.state.username.toUpperCase() }
                            <i class="el-icon-arrow-down el-icon--right"></i>
                        </span>
              <template #dropdown>
                <el-dropdown-menu>
                  <el-dropdown-item command="hideMenu">{ hideMenuText }</el-dropdown-item>
                  <el-dropdown-item command="exit">退出登录</el-dropdown-item>
                </el-dropdown-menu>
              </template>
            </el-dropdown>
          </el-col>
        </el-row>
      </el-header>
      <el-container class="main">
        <el-aside width="200px" v-show="isShowMenu" >
          <el-menu>
            <el-sub-menu index="1">
              <template #title>
                <el-icon><location /></el-icon>
                <span>部门管理</span>
              </template>
              <el-menu-item index="1-1">
                <router-link to="/dept">部门管理</router-link>
              </el-menu-item>
              <el-menu-item index="1-2">
                <span><router-link to="/report">报表</router-link></span>
              </el-menu-item>
            </el-sub-menu>
            <el-menu-item index="2">
              <el-icon><document /></el-icon>
              <span><router-link to="/emp">员工管理</router-link></span>
            </el-menu-item>
          </el-menu>
        </el-aside>

        <el-main>
          <router-view></router-view>
        </el-main>

      </el-container>
      <el-footer>Footer</el-footer>
    </el-container>
  </div>
</template>

<script>
export default {
  data() {
    return {
      hideMenuText: '隐藏菜单',
      isShowMenu: true
    }
  },
  methods: {
    handleCommand(command) {
      if (command == "hideMenu") {
        if (this.hideMenuText == "隐藏菜单") {
          this.hideMenuText = "显示菜单";
          this.isShowMenu = false;
        } else {
          this.hideMenuText = "隐藏菜单";
          this.isShowMenu = true;
        }
      } else if (command == "exit") {
        this.$confirm("真的要退出系统吗?", "提示").then(() => {
          this.$router.push({name: 'login'});
          this.$store.commit("setUsername", "");
        }).catch(() => {
        });
      }
    }
  }
}
</script>

<style scoped>
.el-header,
.el-footer {
  height: 60px;
  background-color: #409EFF;
}

a {
  text-decoration: none;
}

.main_title {
  font-size: 22px;
  color: #fff;
  height: 60px;
  line-height: 60px;
}

.main{
  min-height: 480px;
}

.user_title {
  height: 60px;
  display: flex;
  align-items: center;
  justify-content: center;
}

.el-dropdown-link {
  cursor: pointer;
  color: #FFF;
}

.el-icon-arrow-down {
  font-size: 12px;
}
</style>
部门管理
Dept.vue
<template>
  <div>
    <h1>部门管理</h1>
    <el-button type="primary" @click="add">添加部门</el-button>
    <el-button @click="handleExport">导出数据</el-button>
    <el-table :data="depts">
      <!-- <el-table-column label="部门编号" prop="deptno"></el-table-column> -->
      <!-- <el-table-column label="部门名称" prop="dname"></el-table-column>
      <el-table-column label="部门地址" prop="loc"></el-table-column> -->
      <el-table-column label="部门名称">
        <template #default="{row,$index}">
          <template v-if="row.insert">
            <el-input type="text" v-model="tempDepts[$index].deptno"></el-input>
          </template>
          <template v-else>
            <span>{ row.deptno }</span>
          </template>
        </template>
      </el-table-column>
      <el-table-column label="部门名称">
        <template #default="{row,$index}">
          <template v-if="row.edit">
            <el-input type="text" v-model="tempDepts[$index].dname"></el-input>
          </template>
          <template v-else-if="row.insert">
            <el-input type="text" v-model="tempDepts[$index].dname"></el-input>
          </template>
          <template v-else>
            <span>{ row.dname }</span>
          </template>
        </template>
      </el-table-column>
      <el-table-column label="部门地址">
        <template #default="{row,$index}">
          <template v-if="row.edit">
            <el-input type="text" v-model="tempDepts[$index].loc"></el-input>
          </template>
          <template v-else-if="row.insert">
            <el-input type="text" v-model="tempDepts[$index].loc"></el-input>
          </template>
          <template v-else>
            <span>{ row.loc }</span>
          </template>
        </template>
      </el-table-column>
      <el-table-column>
        <template #default="{row,$index}">
          <template v-if="row.insert">
            <el-button type="primary" @click="insert()">保存</el-button>
            <el-button type="warning" @click="cancelAdd($index)">取消</el-button>
          </template>
          <template v-else-if="row.edit">
            <el-button type="primary" @click="update(row,$index)">保存</el-button>
            <el-button type="warning" @click="cancel(row,$index)">取消</el-button>
          </template>
          <template v-else>
            <el-button type="primary" @click="edit(row)">编辑</el-button>
            <el-button type="warning" @click="del(row,$index)">删除</el-button>
          </template>
        </template>
      </el-table-column>
    </el-table>
  </div>
</template>

<script>
export default {
  data() {
    return {
      depts: [],
      tempDepts: [],
      isAdd: false
    }
  },
  created() {
    this.showData();
  },
  methods: {
    showData() {
      let url = "dept/getAll";
      this.$http.post(url).then(resp => {
        this.depts = resp.data;
        let s = JSON.stringify(this.depts);
        this.tempDepts = JSON.parse(s);
      });
      return true;
    },
    del(row, index) {
      this.$confirm('是否删除?', '提示').then(() => {
        let url = `dept/delete?deptno=${row.deptno}`;
        this.$http.get(url).then(resp => {
          if (resp.data == 1) {
            this.$message({
              type: "success",
              message: "删除成功!"
            });
            this.tempDepts.splice(index, 1)
            this.depts.splice(index, 1)
          } else {
            this.$message({
              type: "error",
              message: "删除失败!"
            });
          }
        });
      }).catch(() => {
      });
    },
    edit(row) {
      row.edit = true;
    },
    cancel(row, index) {
      row.edit = false;
      this.tempDepts[index] = {...this.depts[index]};
    },
    update(row, index) {
      let url = "dept/update";
      this.$http.post(url, this.tempDepts[index]).then(resp => {
        if (resp.data == 1) {
          this.$message({
            type: "success",
            message: "更新成功!"
          })
          row.edit = false;
          this.depts[index] = {...this.tempDepts[index]};
        }
      });
    },
    add() {
      if (this.isAdd) {
        this.$alert("不能同时添加多个部门!");
        return;
      }
      this.isAdd = true;
      this.depts.splice(0, 0, {deptno: '', dname: '', loc: '', insert: true});
      this.tempDepts.splice(0, 0, {deptno: '', dname: '', loc: '', insert: true});
    },
    cancelAdd(index) {
      this.$confirm("是否取消?", "提示").then(() => {
        this.depts.splice(index, 1);
        this.tempDepts.splice(index, 1);
        this.isAdd = false;
      }).catch(() => {
      });
    },
    insert() {
      let url = "dept/insert";
      this.$http.post(url, this.tempDepts[0]).then(resp => {
        if (resp.data == 1) {
          this.$message({
            type: "success",
            message: "添加成功!"
          });
          this.tempDepts[0].insert = false;
          this.depts[0] = {...this.tempDepts[0]};
        } else {
          this.$message({
            type: "error",
            message: "添加失败!"
          });
        }

        this.isAdd = false;
      });
    },
    handleExport() {
      let url = "dept/exportExcel";

      this.$http.get(url, {
        //服务器响应的数据类型,可以是 'arraybuffer', 'blob', 'document', 'json', 'text', 'stream',默认是'json'
        responseType: "blob"
      })
          .then(res => {
            if (!res) return
            const blob = new Blob([res.data], {type: 'application/vnd.ms-excel'}) // 构造一个blob对象来处理数据,并设置文件类型

            if (window.navigator.msSaveOrOpenBlob) { //兼容IE10
              navigator.msSaveBlob(blob, this.filename)
            } else {
              const href = URL.createObjectURL(blob) //创建新的URL表示指定的blob对象
              const a = document.createElement('a') //创建a标签
              a.style.display = 'none'
              a.href = href // 指定下载链接
              a.download = "dept.xls" //指定下载文件名
              a.click() //触发下载
              URL.revokeObjectURL(a.href) //释放URL对象
            }
            // 这里也可以不创建a链接,直接window.open(href)也能下载
          })
          .catch(err => {
            console.log(err)
          })
    }
  }

}
</script>

<style>
</style>
服务器端
控制器
package com.neu.controller;

import java.io.ByteArrayOutputStream;
import java.io.IOException;
import java.util.List;

import com.github.pagehelper.PageInfo;
import org.apache.poi.hssf.usermodel.HSSFWorkbook;
import org.apache.poi.ss.usermodel.*;
import org.apache.poi.ss.util.CellRangeAddress;
import org.springframework.beans.factory.annotation.Autowired;
import org.springframework.http.HttpHeaders;
import org.springframework.http.HttpStatus;
import org.springframework.http.MediaType;
import org.springframework.http.ResponseEntity;
import org.springframework.stereotype.Controller;
import org.springframework.ui.Model;
import org.springframework.web.bind.annotation.RequestBody;
import org.springframework.web.bind.annotation.RequestMapping;
import org.springframework.web.bind.annotation.RestController;

import com.neu.po.Dept;
import com.neu.service.DeptService;

@RestController
@RequestMapping("dept")
public class DeptController {

    @Autowired
    private DeptService deptService;

    @RequestMapping("getById")
    public Dept getById(int deptno) {
        Dept dept = deptService.getById(deptno);

        return dept;
    }

    @RequestMapping("getAll")
    public List<Dept> getAll() {
        List<Dept> list = deptService.getAll();

        return list;
    }

    @RequestMapping("delete")
    public int delete(int deptno) {

        return deptService.delete(deptno);
    }

    @RequestMapping("update")
    public int update(@RequestBody Dept dept) {

        return deptService.update(dept);
    }

    @RequestMapping("insert")
    public int insert(@RequestBody Dept dept) {

        return deptService.insert(dept);
    }

    @RequestMapping("exportExcel")
    public ResponseEntity<byte[]> exportExcel() throws IOException {
        List<Dept> list = deptService.getAll();

        Workbook wb = new HSSFWorkbook();
        Sheet sheet = wb.createSheet("部门");

        // 起始行号
        int rowNum = 1;
        // 起始列号
        int defaultColumnNum = 0;

        int columnNum = defaultColumnNum;

        Row titleRow = sheet.createRow(rowNum++);

        Cell cell = titleRow.createCell(columnNum++);
        cell.setCellValue("编号");

        cell = titleRow.createCell(columnNum++);
        cell.setCellValue("名称");

        cell = titleRow.createCell(columnNum++);
        cell.setCellValue("地址");

        Row row = null;
        for (Dept dept : list) {
            row = sheet.createRow(rowNum++);

            // 每一行的列号从头开始
            columnNum = defaultColumnNum;

            row.createCell(columnNum++).setCellValue(dept.getDeptno());
            row.createCell(columnNum++).setCellValue(dept.getDname());
            row.createCell(columnNum++).setCellValue(dept.getLoc());
        }

        sheet.addMergedRegion(new CellRangeAddress(0, 0, 0, 2));

        Cell cellTitle = sheet.createRow(0).createCell(0);
        cellTitle.setCellValue("部门列表");

        CellStyle titleStyle = wb.createCellStyle();
        titleStyle.setAlignment(HorizontalAlignment.CENTER);
        titleStyle.setVerticalAlignment(VerticalAlignment.CENTER);

        Font font = wb.createFont();
        font.setFontHeightInPoints((short)24);
        //设置粗体
        font.setBold(true);
        font.setFontName("宋体");
        font.setColor(IndexedColors.BLUE.index);

        titleStyle.setFont(font);

        cellTitle.setCellStyle(titleStyle);

        // 创建一个字节数组输出流
        ByteArrayOutputStream bos = new ByteArrayOutputStream();
        // 把工作簿内容写入到输出流中
        wb.write(bos);

        // 创建http协议的头
        HttpHeaders headers = new HttpHeaders();
//		headers.setContentType(MediaType.APPLICATION_OCTET_STREAM);
        // 设置附件的名字
        headers.setContentDispositionFormData("attachment", "dept.xls");

        wb.close();

        return new ResponseEntity<byte[]>(bos.toByteArray(), headers, HttpStatus.CREATED);

    }

}
数据导出
jar
<dependency>
    <groupId>org.apache.poi</groupId>
    <artifactId>poi</artifactId>
    <version>4.1.2</version>
</dependency>
后端
@RequestMapping("exportExcel")
    public ResponseEntity<byte[]> exportExcel() throws IOException {
        List<Dept> list = deptService.getAll();

        Workbook wb = new HSSFWorkbook();
        Sheet sheet = wb.createSheet("部门");

        // 起始行号
        int rowNum = 1;
        // 起始列号
        int defaultColumnNum = 0;

        int columnNum = defaultColumnNum;

        Row titleRow = sheet.createRow(rowNum++);

        Cell cell = titleRow.createCell(columnNum++);
        cell.setCellValue("编号");

        cell = titleRow.createCell(columnNum++);
        cell.setCellValue("名称");

        cell = titleRow.createCell(columnNum++);
        cell.setCellValue("地址");

        Row row = null;
        for (Dept dept : list) {
            row = sheet.createRow(rowNum++);

            // 每一行的列号从头开始
            columnNum = defaultColumnNum;

            row.createCell(columnNum++).setCellValue(dept.getDeptno());
            row.createCell(columnNum++).setCellValue(dept.getDname());
            row.createCell(columnNum++).setCellValue(dept.getLoc());
        }

        sheet.addMergedRegion(new CellRangeAddress(0, 0, 0, 2));

        Cell cellTitle = sheet.createRow(0).createCell(0);
        cellTitle.setCellValue("部门列表");

        CellStyle titleStyle = wb.createCellStyle();
        titleStyle.setAlignment(HorizontalAlignment.CENTER);
        titleStyle.setVerticalAlignment(VerticalAlignment.CENTER);

        Font font = wb.createFont();
        font.setFontHeightInPoints((short)24);
        //设置粗体
        font.setBold(true);
        font.setFontName("宋体");
        font.setColor(IndexedColors.BLUE.index);

        titleStyle.setFont(font);

        cellTitle.setCellStyle(titleStyle);

        // 创建一个字节数组输出流
        ByteArrayOutputStream bos = new ByteArrayOutputStream();
        // 把工作簿内容写入到输出流中
        wb.write(bos);

        // 创建http协议的头
        HttpHeaders headers = new HttpHeaders();
//		headers.setContentType(MediaType.APPLICATION_OCTET_STREAM);
        // 设置附件的名字
        headers.setContentDispositionFormData("attachment", "dept.xls");

        wb.close();

        return new ResponseEntity<byte[]>(bos.toByteArray(), headers, HttpStatus.CREATED);

    }
前端
<el-button @click="handleExport">导出数据</el-button>
handleExport() {
      let url = "dept/exportExcel";

      this.$http.get(url, {
        //服务器响应的数据类型,可以是 'arraybuffer', 'blob', 'document', 'json', 'text', 'stream',默认是'json'
        responseType: "blob"
      })
          .then(res => {
            if (!res) return
            const blob = new Blob([res.data], {type: 'application/vnd.ms-excel'}) // 构造一个blob对象来处理数据,并设置文件类型

            if (window.navigator.msSaveOrOpenBlob) { //兼容IE10
              navigator.msSaveBlob(blob, this.filename)
            } else {
              const href = URL.createObjectURL(blob) //创建新的URL表示指定的blob对象
              const a = document.createElement('a') //创建a标签
              a.style.display = 'none'
              a.href = href // 指定下载链接
              a.download = "dept.xls" //指定下载文件名
              a.click() //触发下载
              URL.revokeObjectURL(a.href) //释放URL对象
            }
            // 这里也可以不创建a链接,直接window.open(href)也能下载
          })
          .catch(err => {
            console.log(err)
          })
    }
数据导入
jar
<dependency>
    <groupId>org.apache.poi</groupId>
    <artifactId>poi</artifactId>
    <version>4.1.2</version>
</dependency>
后端Service
@Transactional//事务处理
    public int importData(InputStream in) throws IOException {
        Workbook wb = new HSSFWorkbook(in);
        //得到工作簿的第一个sheet
        Sheet sheet = wb.getSheetAt(0);
        //得到数据最后一行的行号
        int rows = sheet.getLastRowNum();

        Row row;
        Dept dept = null;
        int id;
        Integer deptno;
        String dname;
        String loc;

        for(int i = 2;i <= rows;i++) {
            //得到行对象
            row = sheet.getRow(i);
            deptno = (int)row.getCell(1).getNumericCellValue();//从第二列开始读取
            dname = row.getCell(2).getStringCellValue();
            loc = row.getCell(3).getStringCellValue();

            dept = new Dept(deptno,dname,loc);

            insert(dept);//调用当前类中的插入方法

        }

        try {
            Thread.sleep(5000);//测试延迟加载效果
        } catch (InterruptedException e) {
            e.printStackTrace();
        }
        return rows - 1;
    }
后端控制器
@PostMapping("import")
public int importData(MultipartFile file) throws IOException {
    return deptService.importData(file.getInputStream());
}
前端
<el-upload
        style="display: inline;margin-left:10px;"
        :show-file-list="false"
        :before-upload="beforeUpload"
        :on-success="onSuccess"
        :on-error="onError"
        action="http://localhost:8089/dept/import"
        :disabled="importDataDisabled"
    >
      <el-button type="success" :disabled="importDataDisabled" :icon="importDataIcon">{btnText}</el-button>
</el-upload>

//导入图标
import {UploadFilled,Loading} from '@element-plus/icons-vue'

data(){
    return{
        importDataDisabled:false,
        importDataIcon:UploadFilled,
        btnText:'导入数据'
    }
}
//方法
beforeUpload(){
    this.btnText = "正在导入";
    this.importDataIcon = Loading;
    this.importDataDisabled=true;
},
onSuccess(){
    this.btnText = "导入数据";
    this.importDataIcon = UploadFilled;
    this.importDataDisabled=false;

    this.$alert("导入成功!");
    //刷新页面
    this.getPaged(1,this.pageInfo.pageSize,this.keyword);
},
onError(){
    this.btnText = "导入数据";
    this.importDataIcon = UploadFilled;
    this.importDataDisabled=false;

    this.$alert("导入失败!");
}
excel文件
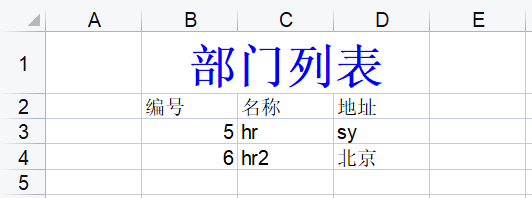
员工管理
<template>
  <div>
    <h1>员工管理</h1>
    <el-button @click="add">添加员工</el-button>
    <el-table :data="pageInfo.list">
      <el-table-column width="80" label="编号" prop="empno"></el-table-column>
      <el-table-column width="80" label="姓名" prop="ename"></el-table-column>
      <el-table-column width="100" label="岗位" prop="job"></el-table-column>
      <el-table-column width="80" label="经理" prop="mgr"></el-table-column>
      <el-table-column width="120" label="入职日期" prop="hiredate"></el-table-column>
      <el-table-column width="80" label="薪水" prop="sal"></el-table-column>
      <el-table-column width="80" label="奖金" prop="comm"></el-table-column>
      <el-table-column width="120" label="部门" prop="dept.dname"></el-table-column>
      <el-table-column label="操作">
        <template #default="{row}">
          <el-button @click="edit(row)">编辑</el-button>
          <el-button @click="del(row)">删除</el-button>
        </template>
      </el-table-column>
    </el-table>

    <el-pagination
        layout="prev,pager,next,total,jumper,sizes"
        :total="pageInfo.total"
        v-model:currentPage="pageInfo.pageNum"
        v-model:page-size="pageInfo.pageSize"
        :page-sizes="[5,10,15,20]"
        background
        @current-change="handleCurrentChange"
        @size-change="handleSizeChange"
    >
    </el-pagination>

    <el-dialog v-model="disableDialog" :title="dialogTitle" center width="500px">
      <el-form>
        <el-row :gutter="20">
          <el-col :span="12">
            <el-form-item label="员工编号">
              <el-input v-model="emp.empno" placeholder="员工编号"></el-input>
            </el-form-item>
          </el-col>
          <el-col :span="12">
            <el-form-item label="员工姓名">
              <el-input v-model="emp.ename" placeholder="员工姓名"></el-input>
            </el-form-item>
          </el-col>
        </el-row>
        <el-row :gutter="20">
          <el-col :span="12">
            <el-form-item label="员工岗位">
              <el-input v-model="emp.job" placeholder="员工岗位"></el-input>
            </el-form-item>
          </el-col>
          <el-col :span="12">
            <el-form-item label="员工经理">
              <el-input v-model="emp.mgr" placeholder="员工经理"></el-input>
            </el-form-item>
          </el-col>
        </el-row>
        <el-row :gutter="20">
          <el-col :span="12">
            <el-form-item label="入职日期">
              <el-date-picker v-model="emp.hiredate" placeholder="入职日期"></el-date-picker>
            </el-form-item>
          </el-col>
          <el-col :span="12">
            <el-form-item label="员工薪水">
              <el-input v-model="emp.sal" placeholder="员工薪水"></el-input>
            </el-form-item>
          </el-col>
        </el-row>
        <el-row :gutter="20">
          <el-col :span="12">
            <el-form-item label="员工奖金">
              <el-input v-model="emp.comm" placeholder="员工奖金"></el-input>
            </el-form-item>
          </el-col>
          <el-col :span="12">
            <el-form-item label="员工部门">
              <el-select v-model="emp.dept.deptno" style="width:215px">
                <el-option
                    v-for="dept in depts"
                    :key="dept.deptno"
                    :value="dept.deptno"
                    :label="dept.dname"
                ></el-option>
              </el-select>
            </el-form-item>
          </el-col>
        </el-row>
      </el-form>
      <template #footer>
        <el-button type="warning" @click="disableDialog=false">取消</el-button>
        <el-button type="primary" @click="saveData">保存</el-button>
      </template>
    </el-dialog>
  </div>
</template>

<script>
// import { ref } from 'vue'
export default {
  data() {
    return {
      pageInfo: {},
      disableDialog: false,
      emp: {dept: {},
      depts: [],
      dialogTitle: ""
    }
  },
  created() {
    this.showData(1, 5);
    this.getDepts();
  },
  methods: {
    showData(pageNum, pageSize) {
      let url = `emp/getPaged`;

      this.$http.post(url, `pageNum=${pageNum}&pageSize=${pageSize}`).then((resp) => {
        console.log(resp);
        this.pageInfo = resp.data;
      });
    },
    edit(row) {
      this.disableDialog = true;
      this.dialogTitle = "编辑员工";
      this.emp = {...row};
    },
    add() {
      this.disableDialog = true;
      this.dialogTitle = "添加员工";
      this.emp = {dept: {};
    },
    del(row) {
      this.$confirm("是否删除员工?", "提示", {
        confirmButtonText: '确定',
        cancelButtonText: '取消',
        type: 'warning'
      }).then(() => {
            let url = `emp/delete?empno=${row.empno}`;
            // var url = `emp/delete?empno=1230`;
            this.$http.get(url).then(resp => {
              if (resp.data == 1) {
                this.$message({
                  type: "success",
                  message: "删除成功!"
                })
                this.showData(1, this.pageInfo.pageSize);
              } else {
                this.$message({
                  type: 'error',
                  message: '删除失败!'
                });
              }
            });
          }
      ).catch(() => {
      });
    },
    handleCurrentChange(pageNum) {
      this.showData(pageNum, this.pageInfo.pageSize);
    },
    handleSizeChange(pageSize) {
      this.showData(1, pageSize);
    },
    getDepts() {
      var url = "dept/getAll";

      this.$http.get(url).then(resp => {
        this.depts = resp.data;
      });
    },
    update() {
      var url = "emp/update";
      this.$http.post(url, this.emp).then(resp => {
        if (resp.data == 1) {
          this.$message({
            type: "success",
            message: "更新成功!"
          });
          this.disableDialog = false;
          this.showData(1, this.pageInfo.pageSize);
        }
      });
    },
    saveData() {
      if (this.dialogTitle == "编辑员工") {
        this.update();
      } else {
        this.insert();
      }
    },
    insert() {
      var url = "emp/insert";
      this.$http.post(url, this.emp).then(resp => {
        if (resp.data == 1) {
          this.$message({
            type: "success",
            message: "添加成功!"
          });
          this.disableDialog = false;
          this.showData(1, this.pageInfo.pageSize);
        }
      });
    }
  }
}
</script>

<style>
</style>
下拉菜单
<el-header>
        <!-- <h1>东软人力资源管理系统-{$store.state.username}</h1>
         -->
        <el-row>
          <el-col :span="6">
            <span class="main_title">东软人力资源管理系统</span>
          </el-col>
          <el-col :span="2" :offset="16" class="user_title">
            <!--  -->
            <el-dropdown class="el-dropdown-link" @command="handleCommand">
                        <span>
              { $store.state.username.toUpperCase() }
              <el-icon class="el-icon--right">
                <arrow-down />
              </el-icon>
                        </span>
              <template #dropdown>
                <el-dropdown-menu>
                  <el-dropdown-item command="hideMenu">{ hideMenuText }</el-dropdown-item>
                  <el-dropdown-item command="exit">退出登录</el-dropdown-item>
                </el-dropdown-menu>
              </template>
            </el-dropdown>
          </el-col>
        </el-row>
      </el-header>
data(){
    return{
        menuText:'隐藏菜单'
    }
}

handleCommand(command){
    if(command == "hideMenu"){
        if(this.menuText == "隐藏菜单"){
            this.menuText = "显示菜单";
        }else{
            this.menuText = "隐藏菜单";
        }
    }else if(command == "exit"){
        this.$confirm("真的要退出系统吗?","提示").then(()=>{
            this.$router.push("/login");
            sessionStorage.clear();
        }).catch(()=>{});
    }
}

<el-aside v-show="menuText=='隐藏菜单'">
</el-aside>
记住用户名
复选框绑定变量
<el-checkbox  v-model="remember">记住用户名</el-checkbox>

data(){
    return{
        remember:false
    }
}
登录成功后,判断是否选中了记住用户名
this.$http.get(url,{params:this.user}).then((resp)=>{
    if(resp.data){
        this.$store.commit("setUsername",this.user.username);

        if(this.remember){
            localStorage.setItem("username",this.user.username);
        }else{
            localStorage.removeItem("username");
        }

        this.$router.push("/main");
    }else{
        this.$alert("用户名或密码错误!");
    }
})
在打开登录页的时候,判断localStorage中是否包含用户名
created(){
    let username = localStorage.getItem("username");
      if(username){
        this.user.username = username;
        this.remember = true;
      }
}
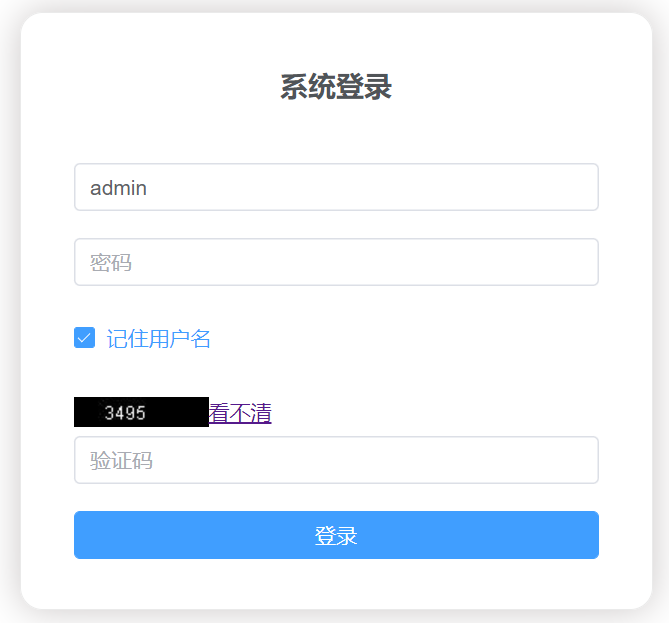
tabs
https://www.w3cschool.cn/vue_elementplus/vue_elementplus-d3ph3kqx.html
基础案例
<template>
  <el-tabs v-model="activeName" @tab-click="handleClick">
    <el-tab-pane label="用户管理" name="first">用户管理</el-tab-pane>
    <el-tab-pane label="配置管理" name="second">配置管理</el-tab-pane>
    <el-tab-pane label="角色管理" name="third">角色管理</el-tab-pane>
    <el-tab-pane label="定时任务补偿" name="fourth">定时任务补偿</el-tab-pane>
  </el-tabs>
</template>
<script>
  export default {
    data() {
      return {
        activeName: 'second'
      };
    },
    methods: {
      handleClick(tab, event) {
        console.log(tab, event);
      }
    }
  };
</script>
选项卡样式
只需要设置 type 属性为 card 或 border-card 就可以使选项卡改变为标签风格。
<el-tabs type="border-card"> 或 <el-tabs type="card">
位置
标签一共有四个方向的设置 tabPosition=”left|right|top|bottom”
<el-tabs tab-position="left" style="height: 200px;">
    <el-tab-pane label="用户管理">用户管理</el-tab-pane>
</el-tabs>
自定义标签页图标
<el-tabs type="border-card">
  <el-tab-pane>
      <template #label>
          <el-icon><House /></el-icon>
        我的行程
      </template>
      我的行程
    </el-tab-pane>
  <el-tab-pane label="消息中心">消息中心</el-tab-pane>
  <el-tab-pane label="角色管理">角色管理</el-tab-pane>
  <el-tab-pane label="定时任务补偿">定时任务补偿</el-tab-pane>
</el-tabs>
动态增减标签页
增减标签页按钮只能在选项卡样式的标签页下使用

<template>
  <el-tabs
  v-model="editableTabsValue"
  type="card"
  editable
  @edit="handleTabsEdit"
>
  <el-tab-pane
    :key="item.name"
    v-for="(item, index) in editableTabs"
    :label="item.title"
    :name="item.name"
  >
    {item.content}
  </el-tab-pane>
</el-tabs>
</template>

<script>
  export default {
    data() {
      return {
        editableTabsValue: '2',
        editableTabs: [
          {
            title: 'Tab 1',
            name: '1',
            content: 'Tab 1 content',
          },
          {
            title: 'Tab 2',
            name: '2',
            content: 'Tab 2 content',
          },
        ],
        tabIndex: 2,
      }
    },
    methods: {
      handleTabsEdit(targetName, action) {
        if (action === 'add') {
          let newTabName = ++this.tabIndex + ''
          this.editableTabs.push({
            title: 'New Tab',
            name: newTabName,
            content: 'New Tab content',
          })
          this.editableTabsValue = newTabName
        }
        //实现目标:如果关闭的tab不是当前激活的,关闭tab后,保留原来激活的tab
        //如果关闭的是当前激活的tab,先激活下一个,如果没有,激活上一个
        //如果关闭的是最后一个,不用设置激活的tab
        if (action === 'remove') {
          let tabs = this.editableTabs
          let activeName = this.editableTabsValue
          if (activeName === targetName) {
            tabs.forEach((tab, index) => {
              if (tab.name === targetName) {
                let nextTab = tabs[index + 1] || tabs[index - 1]
                //如果存在可激活tab,设置激活tab的name到临时变量activeName中
                if (nextTab) {
                  activeName = nextTab.name
                }
              }
            })
          }

          this.editableTabsValue = activeName
          this.editableTabs = tabs.filter((tab) => tab.name !== targetName)
        }
      },
    },
  }
</script>
自定义增加标签页触发器

<template>
  <div style="margin-bottom: 20px;">
  <el-button size="small" @click="addTab(editableTabsValue)">
    add tab
  </el-button>
</div>
<el-tabs
  v-model="editableTabsValue"
  type="card"
  closable
  @tab-remove="removeTab"
>
  <el-tab-pane
    v-for="(item, index) in editableTabs"
    :key="item.name"
    :label="item.title"
    :name="item.name"
  >
    {item.content}
  </el-tab-pane>
</el-tabs>
</template>

<script>
  export default {
    data() {
      return {
        editableTabsValue: '2',
        editableTabs: [
          {
            title: 'Tab 1',
            name: '1',
            content: 'Tab 1 content',
          },
          {
            title: 'Tab 2',
            name: '2',
            content: 'Tab 2 content',
          },
        ],
        tabIndex: 2,
      }
    },
    methods: {
      addTab(targetName) {
        let newTabName = ++this.tabIndex + ''
        this.editableTabs.push({
          title: 'New Tab',
          name: newTabName,
          content: 'New Tab content',
        })
        this.editableTabsValue = newTabName
      },
      removeTab(targetName) {
        let tabs = this.editableTabs
        let activeName = this.editableTabsValue
        if (activeName === targetName) {
          tabs.forEach((tab, index) => {
            if (tab.name === targetName) {
              let nextTab = tabs[index + 1] || tabs[index - 1]
              if (nextTab) {
                activeName = nextTab.name
              }
            }
          })
        }

        this.editableTabsValue = activeName
        this.editableTabs = tabs.filter((tab) => tab.name !== targetName)
      },
    },
  }
</script>
关闭Tab
<el-tabs type="card" closable v-model="activeName" @tab-remove="handleRemove">
</el-tabs>

handleRemove(targetName){
                let temp = this.activeName;
                if(this.activeName === targetName){
                    this.editableTabs.forEach((tab,index)=>{
                        if(tab.name === this.activeName){
                            let nextTab = this.editableTabs[index+1]||this.editableTabs[index-1];
                            if(nextTab){
                                temp = nextTab.name;
                            }
                        }
                    })
                }

                this.activeName = temp;
                //排除要删除的tab
                this.editableTabs = this.editableTabs.filter(tab=>tab.name !== targetName);
}
springboot中JSON时区设置
#使用24小时的时间格式
#spring.jackson.default-property-inclusion=NON_NULL
#设置日期格式
spring.jackson.date-format=yyyy-MM-dd HH:mm:ss
#设置时区,GMT:格林威治时间
spring.jackson.time-zone=GMT+8